

Song and Rack States
Cantabile Performer Only
States provide a way to save the state of a song or rack and then recall those states to quickly switch between different configurations. States can be used to control most route settings, plugin presets and parameters, metronome settings, gain and mix levels and more.
The main purpose of states is to provide a fast mechanism for switching between the required sounds and settings for different songs or song parts.
This video walkthrough also demonstrates how to use states.
Terminology
The term "state" refers to the general ability to take a snapshot of a song or rack and save it with a supplied name.
Although songs and rack both support states, the typical use case for each is different:
- For racks, states are typically used like plugin presets where each state represents a different sound.
- For songs, states are typically used to represent the different parts of the song - intro, chorus, verse etc...
For this reason song states are often referred to as "Song Parts". Song Parts and Rack States are functionally identical.
If you're familiar with Cantabile 2 you should also note that "States" is the new name for what used to be called "Sub-Sessions".
Walk-through
The easiest way to understand states is with a simple walk through. First let's setup a simple song with two instruments:
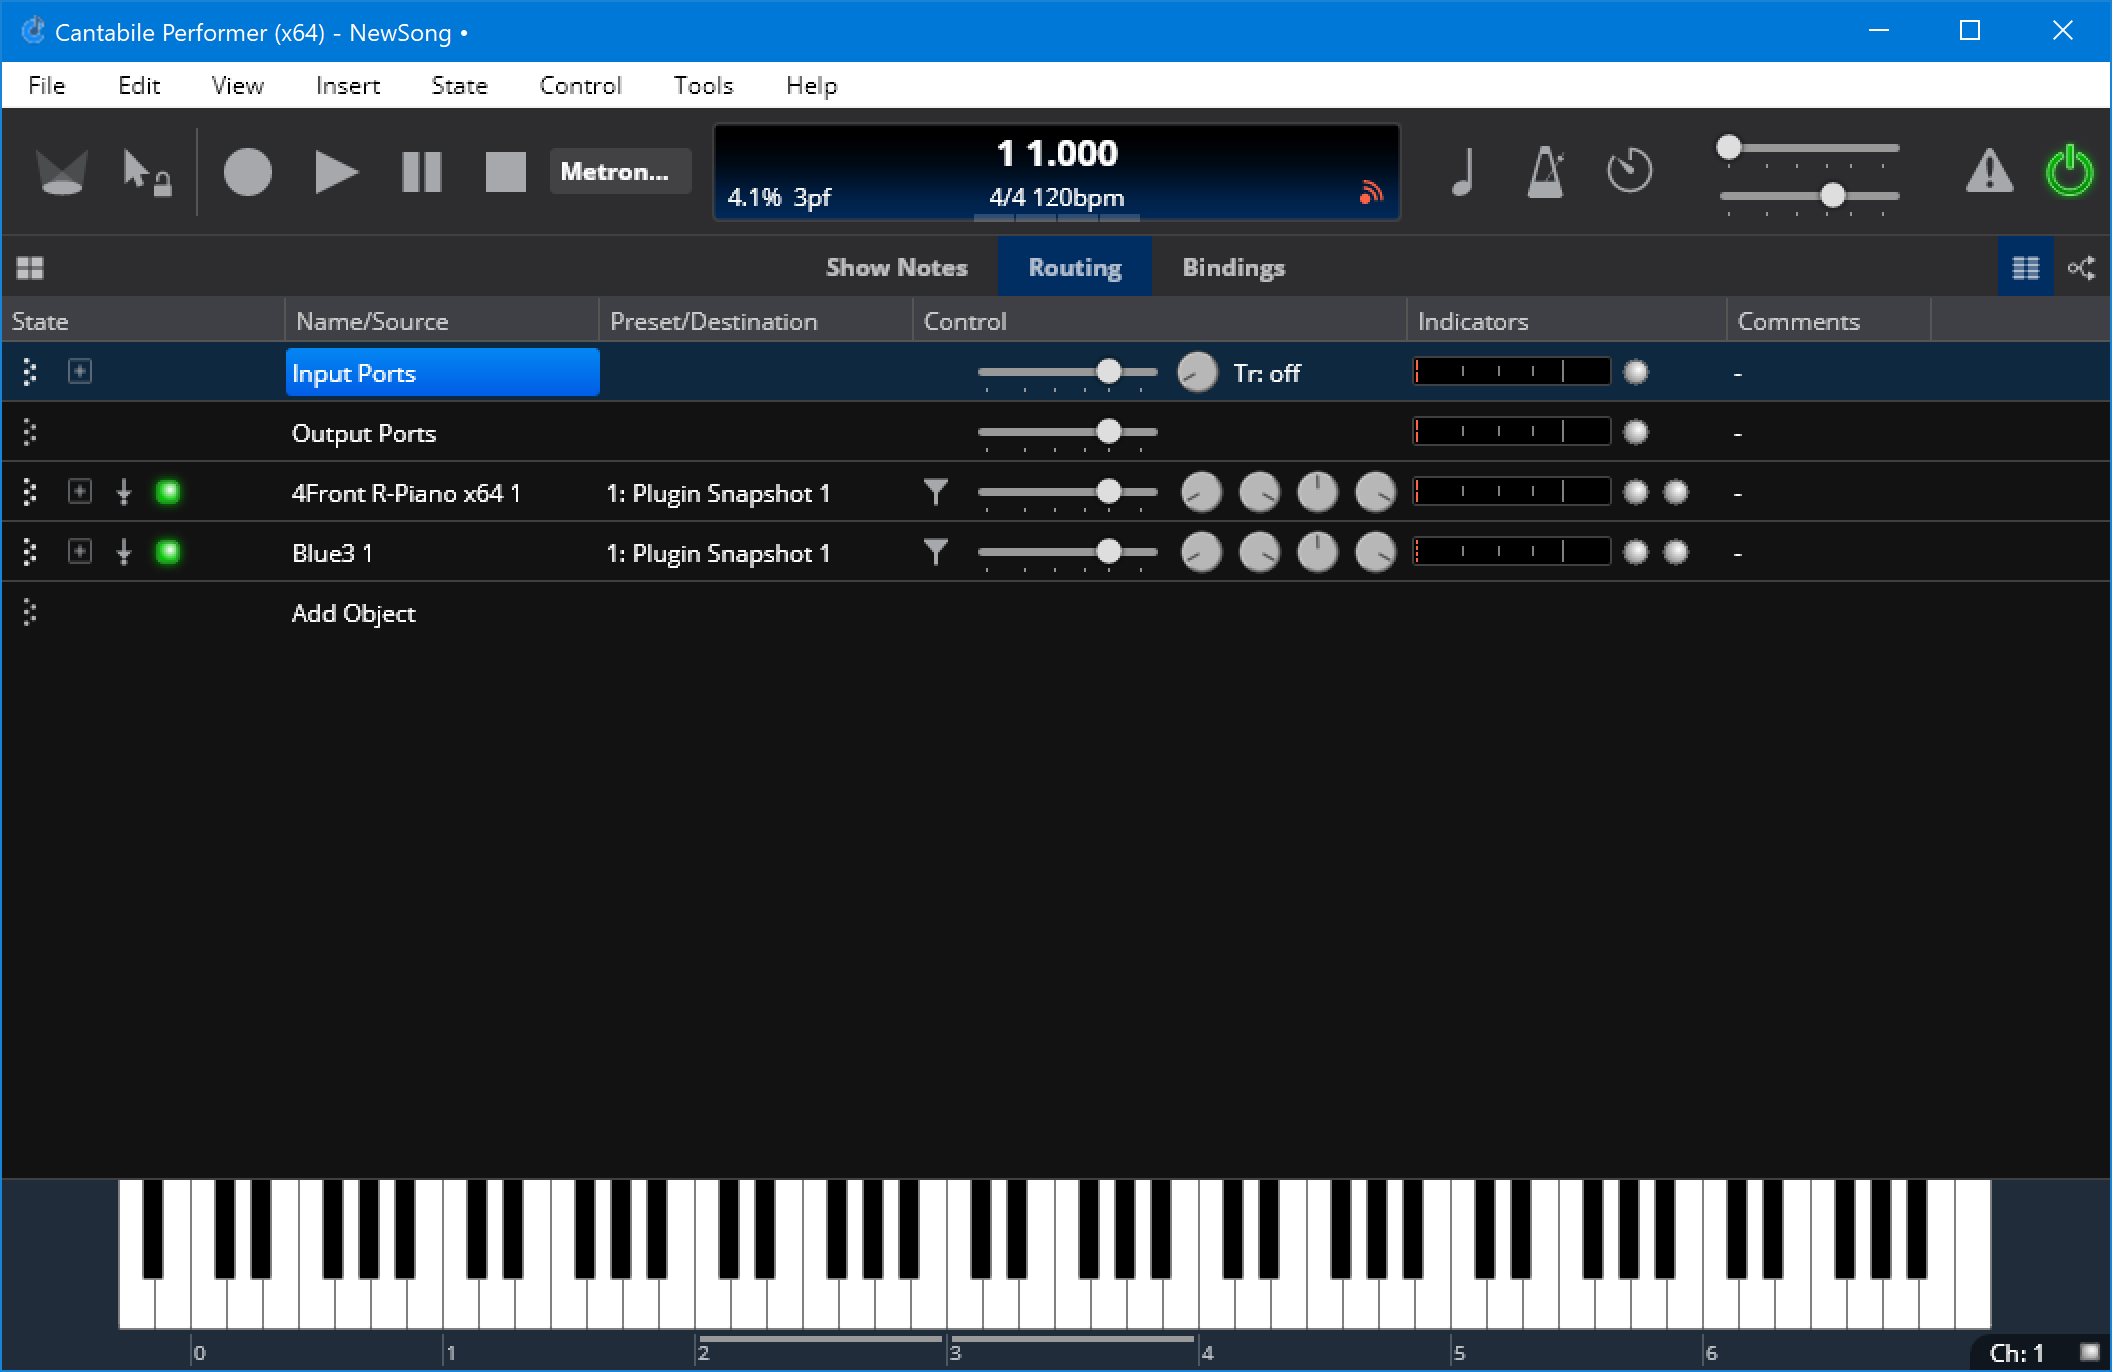
The rest of this guide will setup the states so that the one keyboard can be used play both instruments by quickly switching between them.
States Panel
States are managed in the States panel which can be activated using the View|States menu command or by pressing Ctrl+T:

You can hide the state list by resizing it down until it disappears, or by activating it and pressing Shift+Escape.
(Note that although we're editing the song's states, the panel is labelled "Song Parts" to suggest how states on a song are intended to be used)
Creating and Configuring States
We will now configure two states to switch between the two instruments.
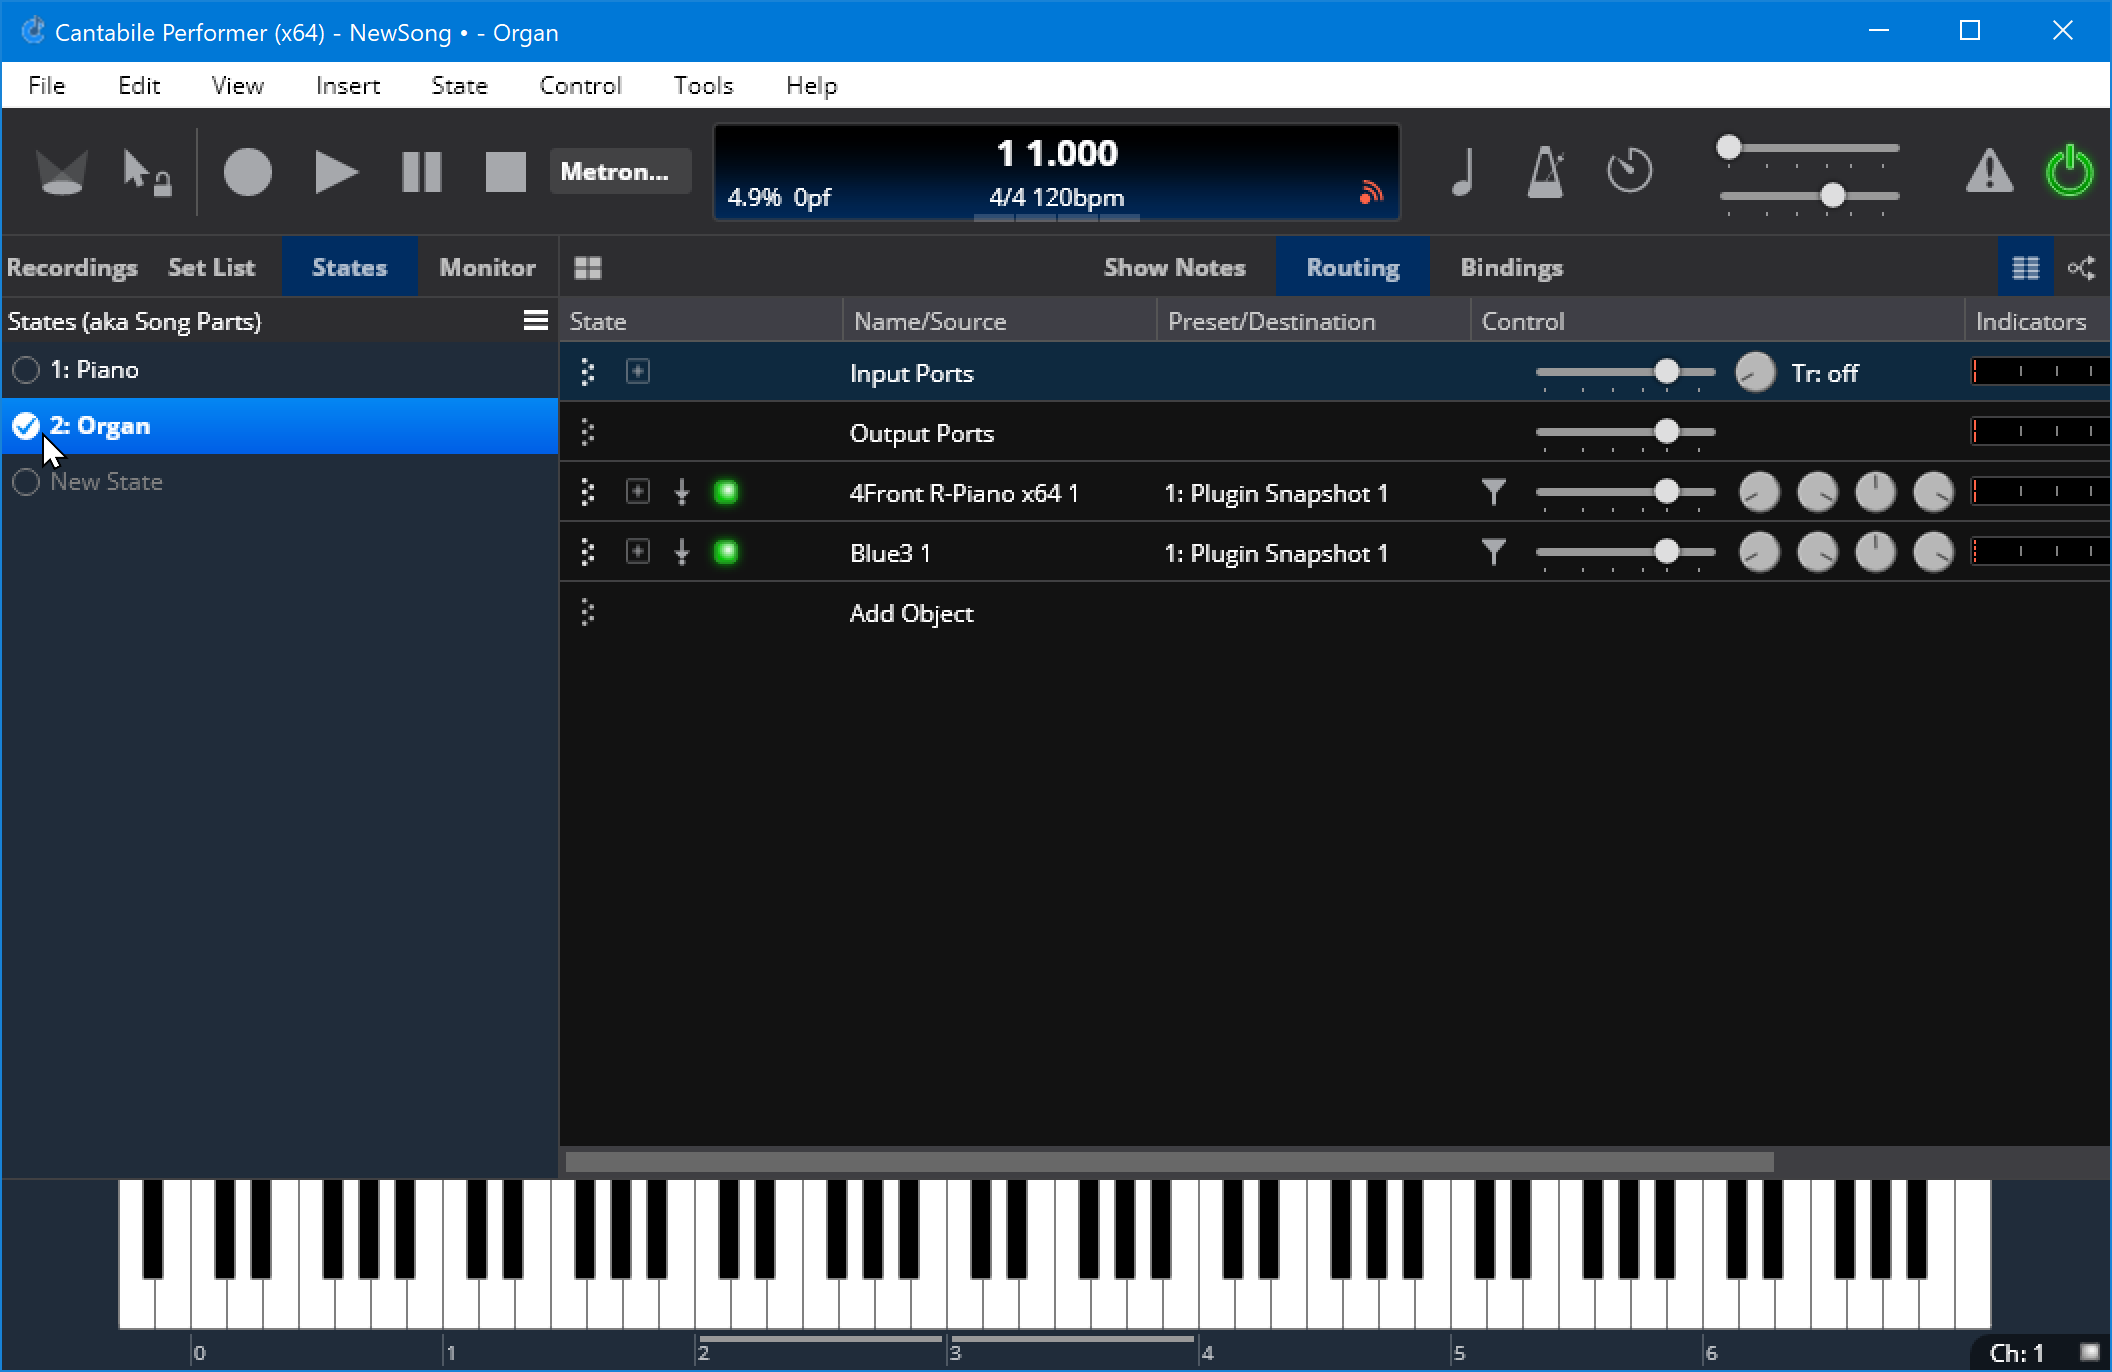
To create a state select Insert|State from the main menu, or click the little circle next to "New State" in the state panel list. You'll be prompted to enter a name for the state after which the current state will be captured and the state will be added to the state panel list. Do this twice to create two states:
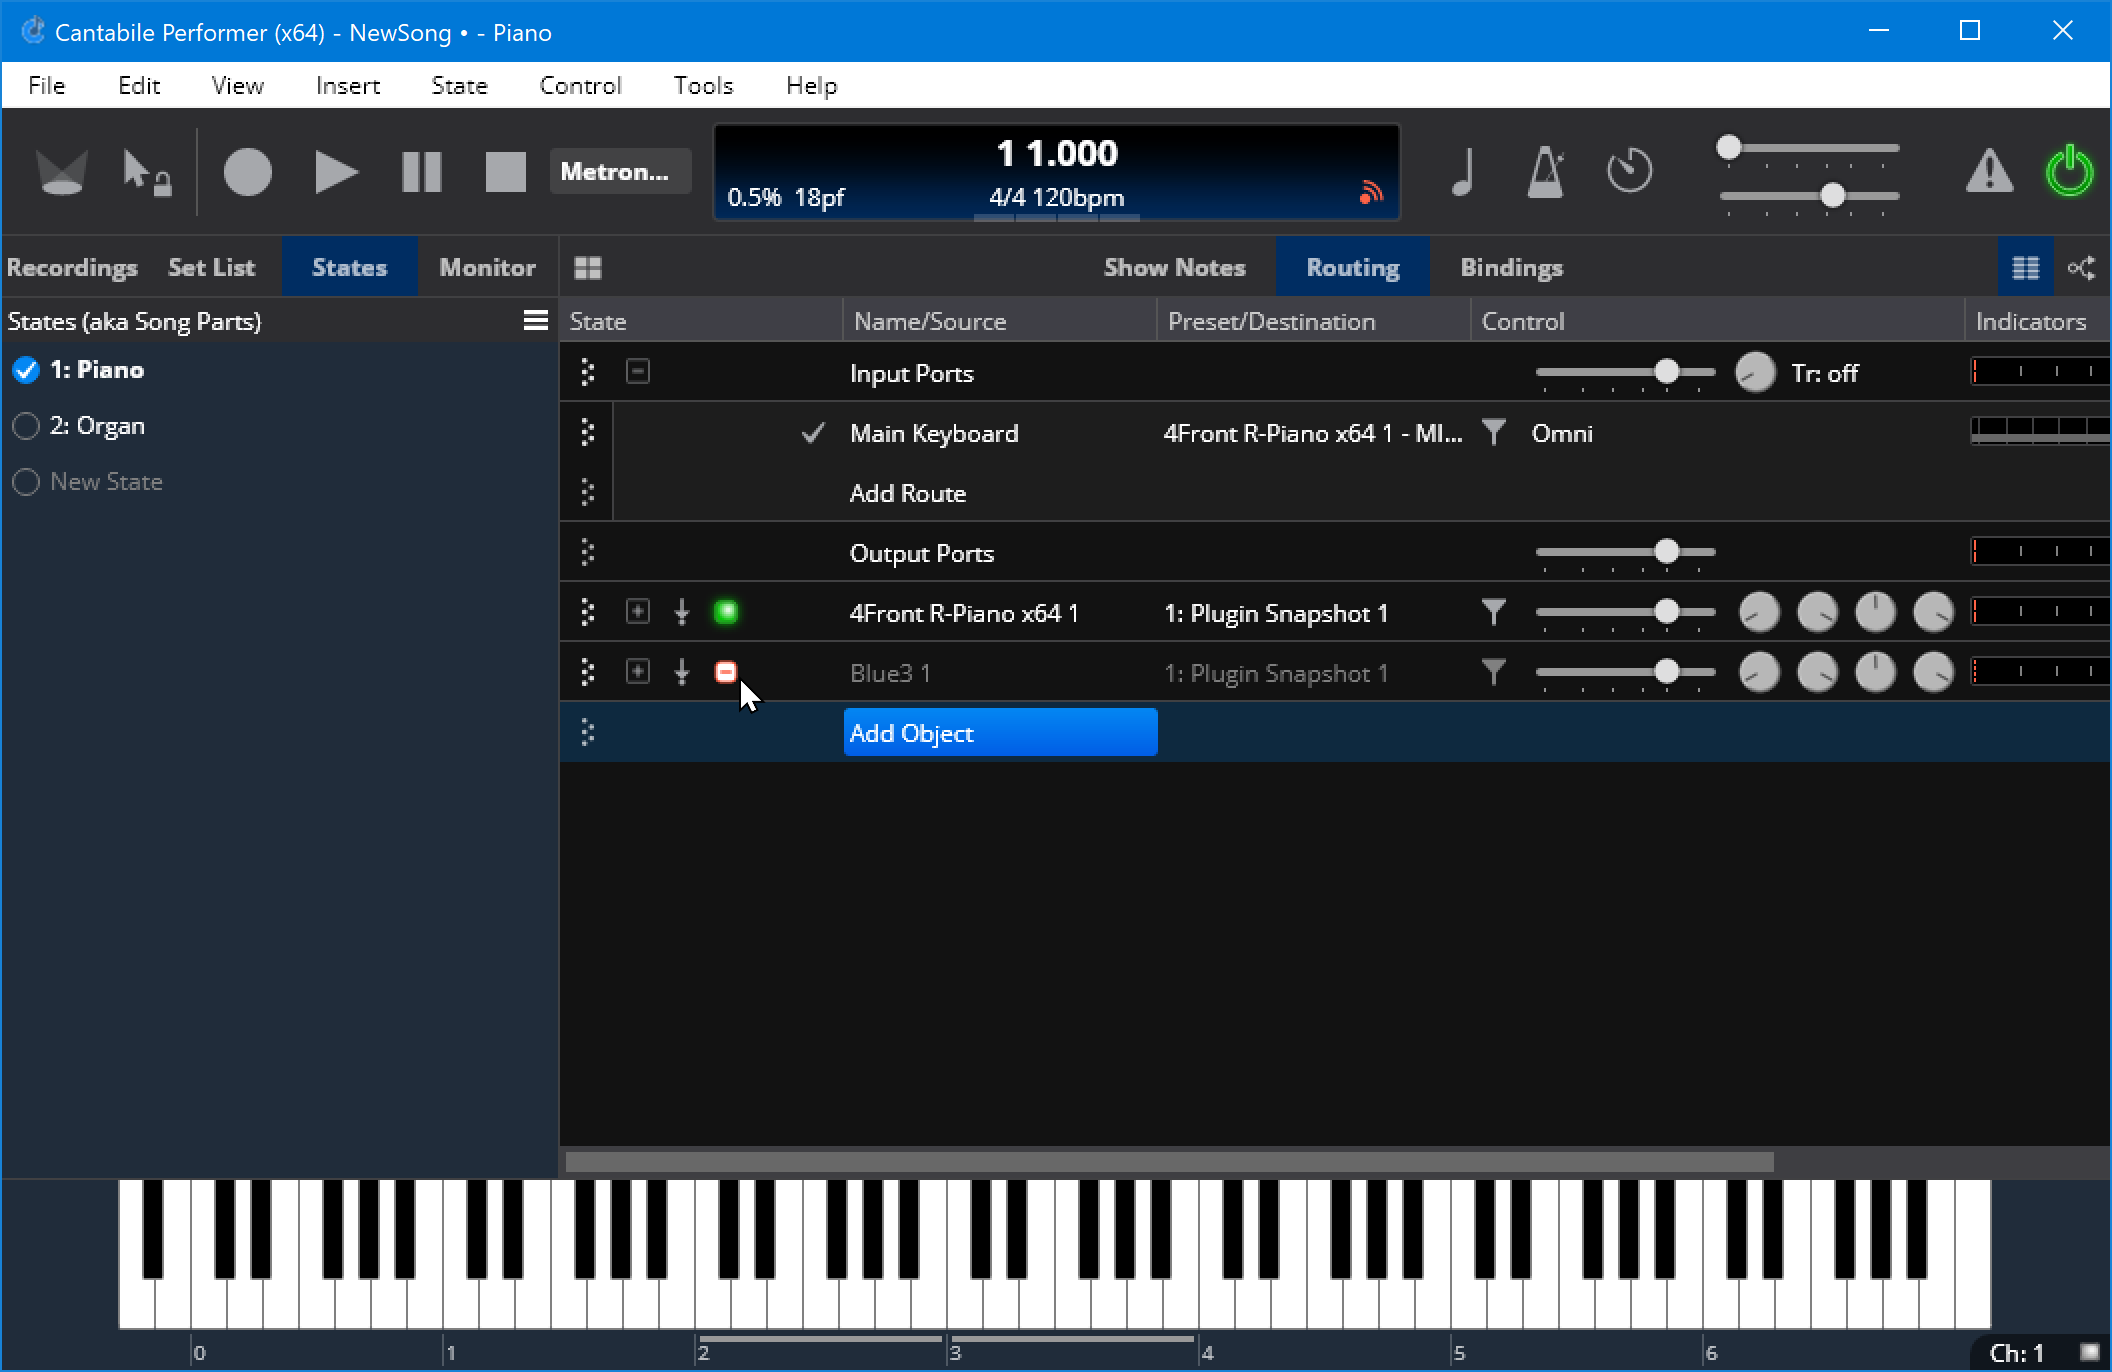
Now switch back to the first state "Piano" by clicking the circle next to it. Configure the state by:
- Delete the second input MIDI route - we'll be using the one route for both instruments.
- Switch the synth plugin to suspended mode since we we won't be using it in the "Piano" state. (click the green active indicator to make it orange).
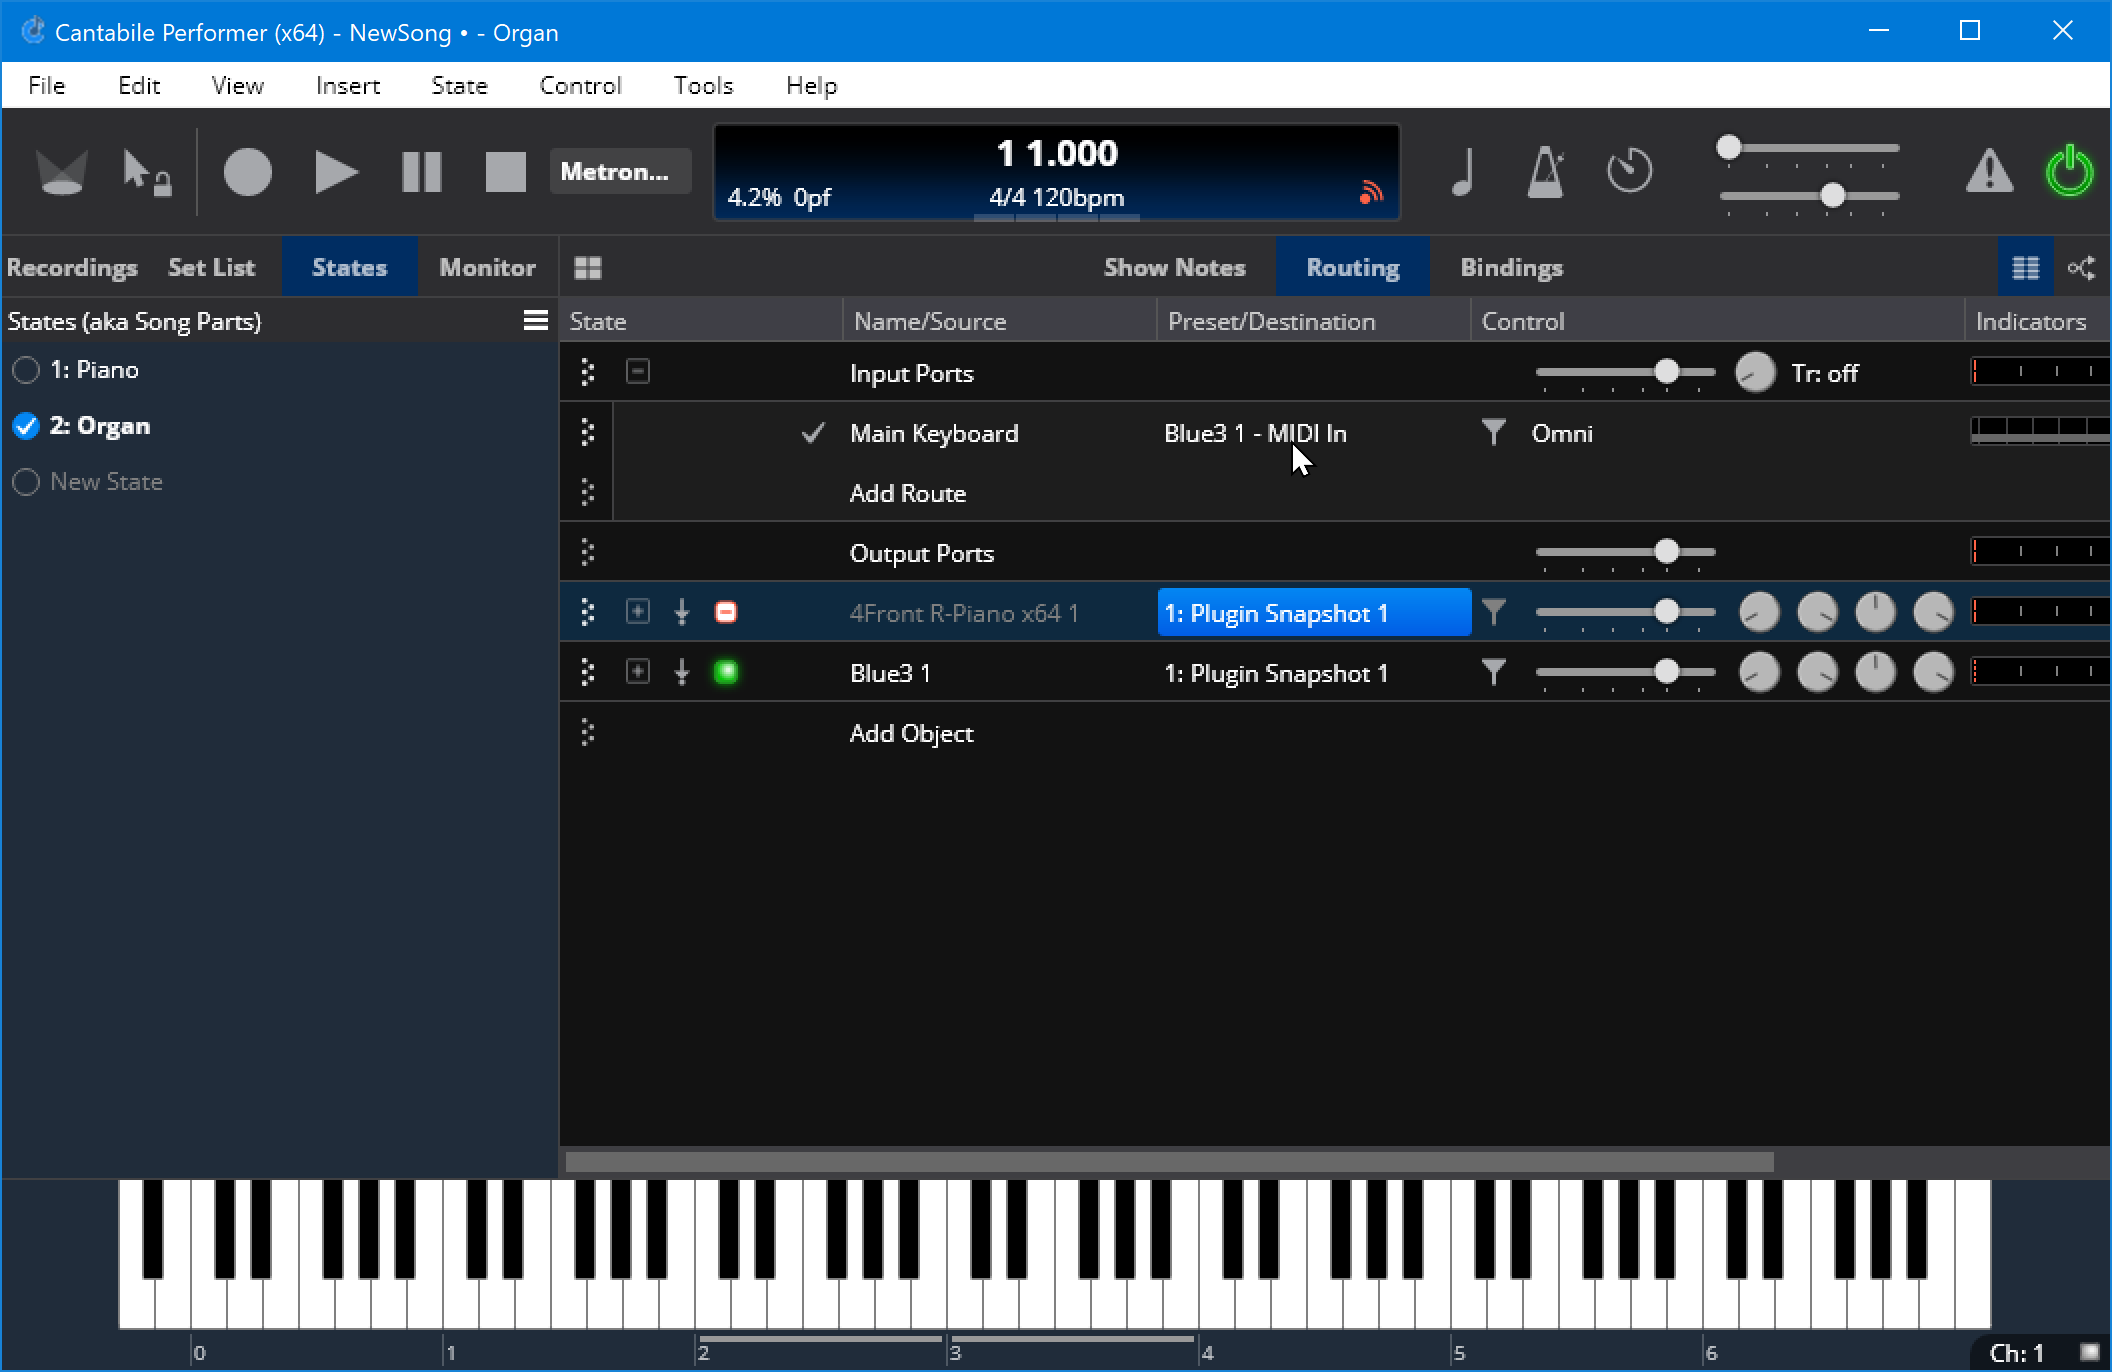
Repeat the same process (but opposite) to configure the "Organ" state:
- Change the MIDI route's target to the organ plugin instead of the piano.
- Suspend the piano plugin and resume the organ.
Switching Between States
Once you're states are setup, there are different ways to switch between them:
- click the radio button (circle) to the left of the state name
- double click the list entry
- select the list entry and press Enter to load it
- use the Next State/Previous State commands from the Control menu
- press the T and Shift+T keys to move to the next or previous state
- using Bindings
If you switch between the two states and play notes from an attached keyboard you should hear a different sound on each state.
Locked States
Normally Cantabile will automatically re-save the current state when switching to another state. This makes it easy to setup your states by just switching between them and configuring things as you need them.
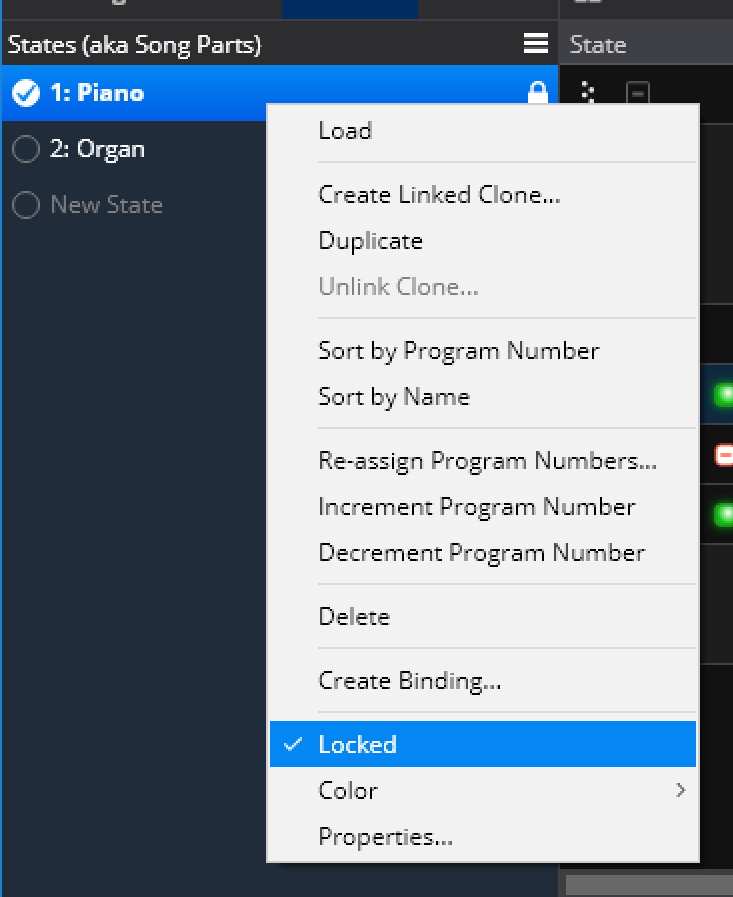
Once you've got a state setup correctly however you might like more explicit control over when the state is updated. To support this you can lock a state. Just right click on it and choose "Locked".
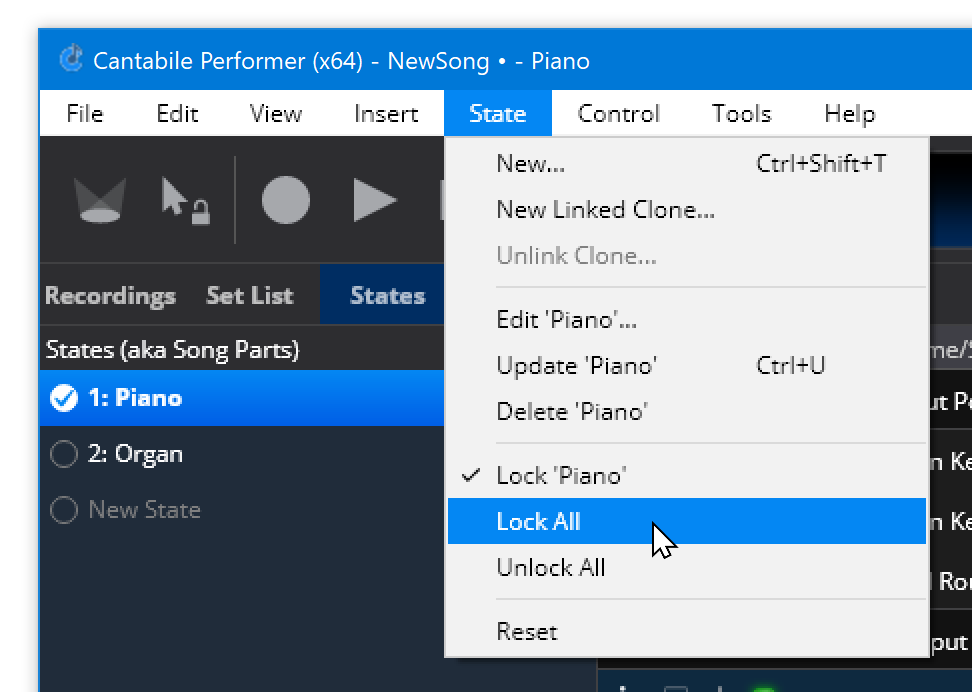
You can also lock and unlock all states via the States menu:
Locking states can also make state switching faster since the current state doesn't need to be re-saved each time.
State Behaviors
Sometimes there will be attributes that you don't want controlled by states. For example, you might have a MIDI route that should always route to a particular target and you don't want it accidentally changed when switching states. This type of control is called State Behaviors.
State behaviors are configured in the State Behavior panel which appears below the state list. If hidden you can show it by choosing States Behavior from the View menu.
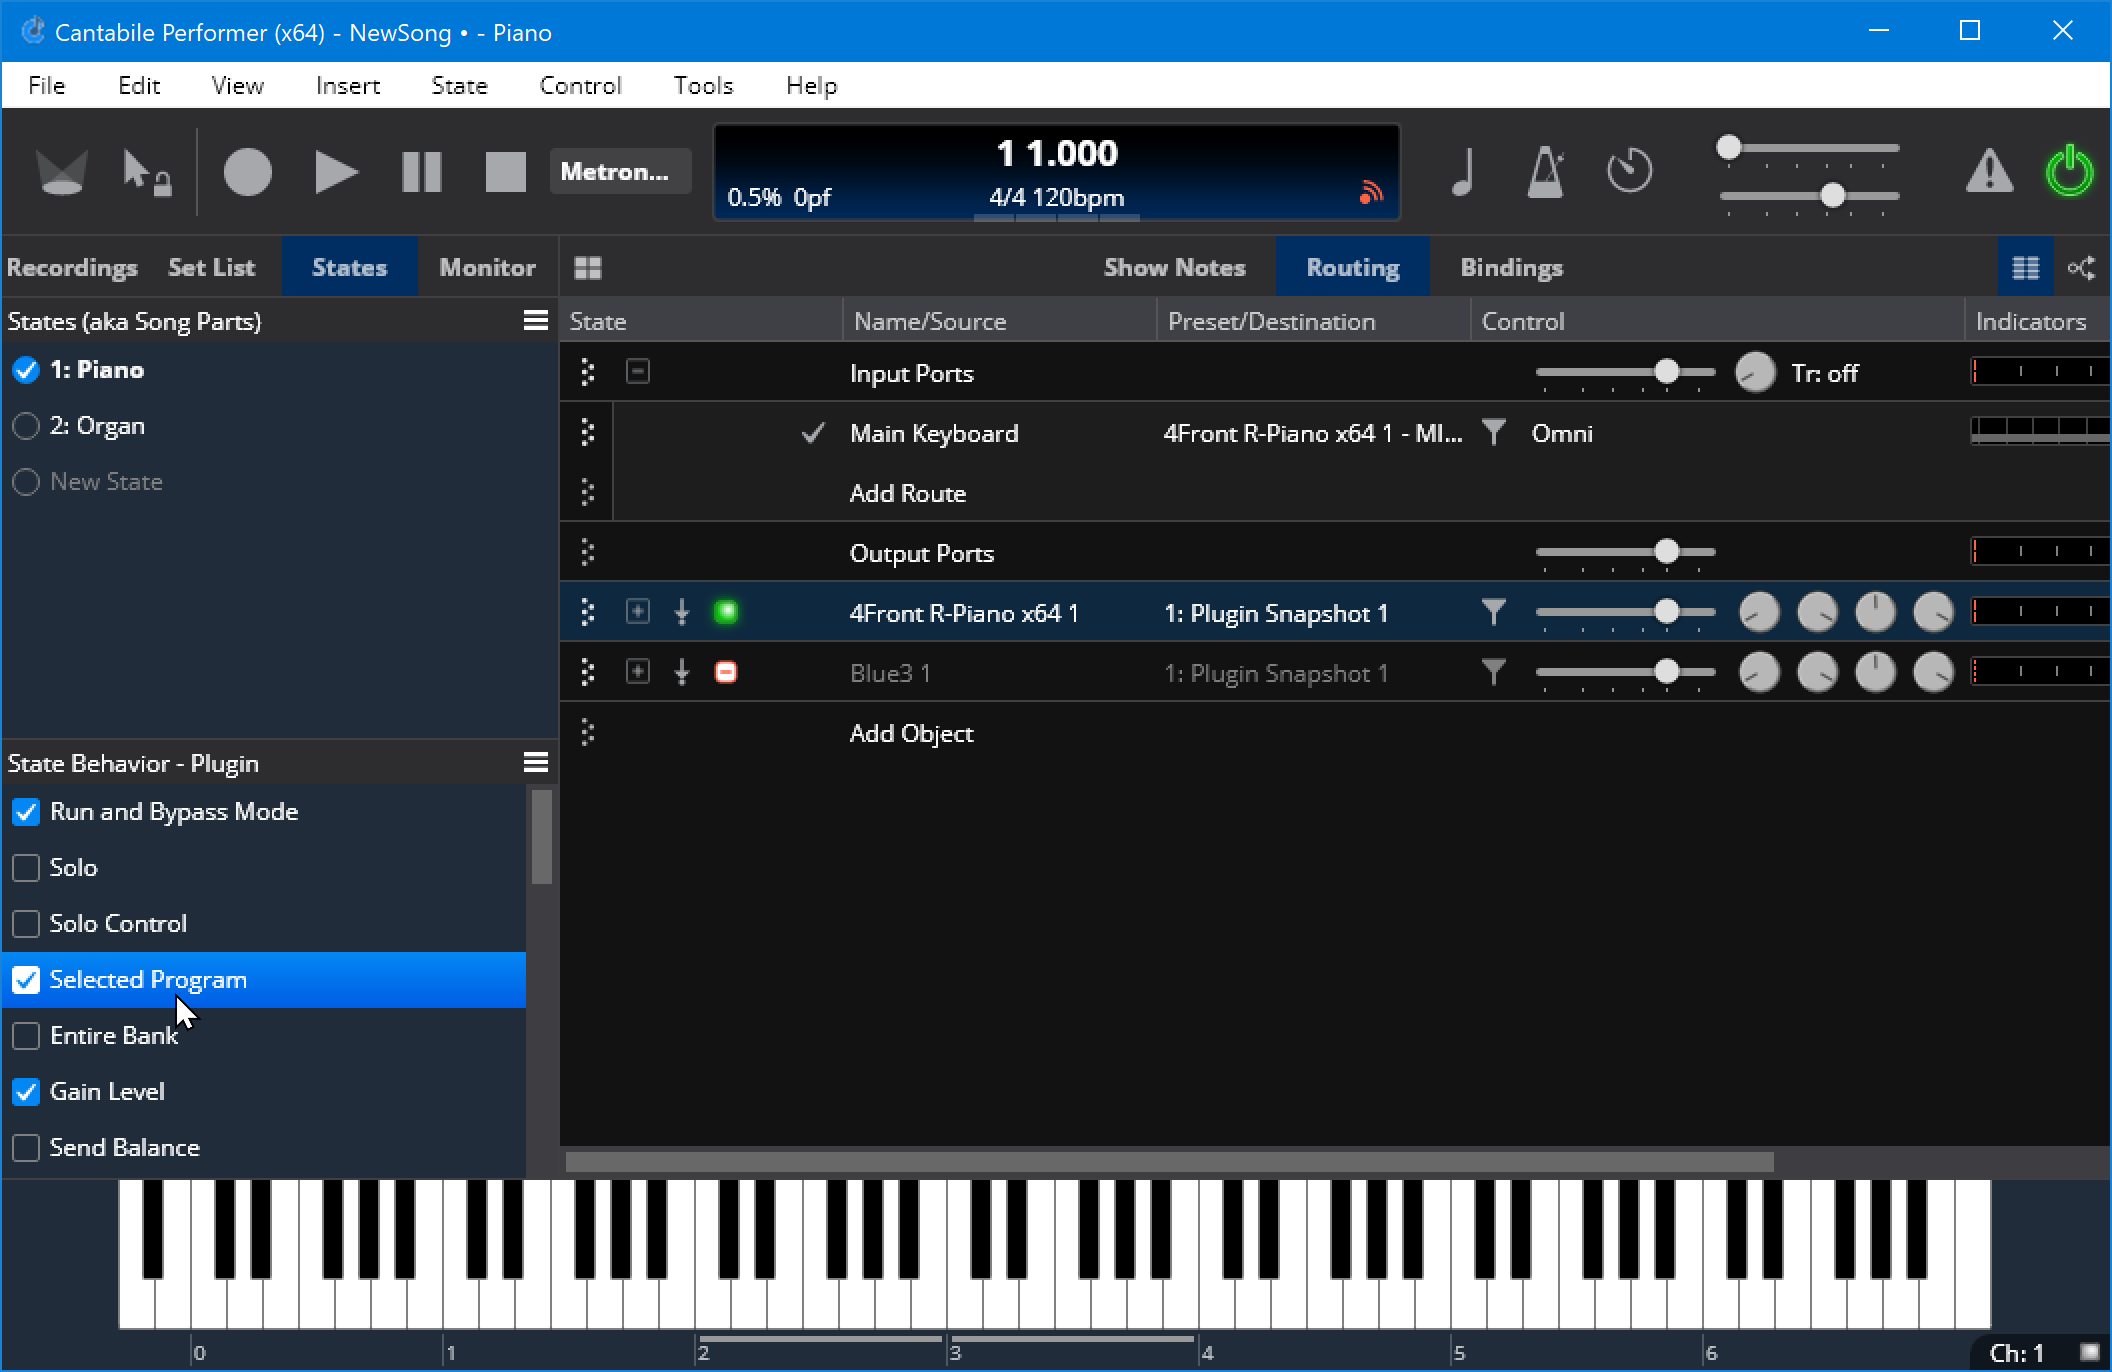
To change the state behavior of an item, first select it (eg: select a route, plugin, metronome etc...) and then check or uncheck the attributes you want controlled by states.
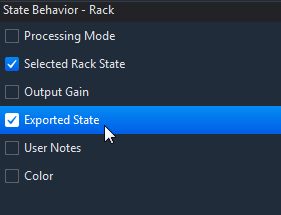
Exported Settings
When editing state behaviours in a rack, the panel shows an extra check mark option next to each behaviour.
- Select the first checkmark to indicate that the setting should be exported to the parent song.
- Select the second checkmark to indicate that the setting should be controlled by the rack state.
There are couple of nuances to these settings:
- If only the first option is selected, changing the selected state in the rack will not affect the setting, but switching parent songs (or possibly parent song states) will update the setting.
- If only the second option is selected, switching songs or song states will not affect the setting, but changing the selected rack state will.
- If both options are selected, the setting will be stored in both the rack state and the parent song. Changing the selected rack state will reset the parent song's saved settings to the settings saved in the rack's state.
- If neither option is selected, the setting is not affected by song or rack state changes.
By default, the parent song file will store a copy of each exported setting for each of its song states. ie: each part in the song can individually control the exported settings.
You can change this behaviour with the "Exported State" behaviour on the parent rack slot:
- Exit from editing the rack
- Select the rack slot in the parent song file
- Open the State Behaviour panel
- Remove the checkmark from the "Exported State" item
Now all settings exported from the rack will be stored on a per-song, rather than a per-song-state basis.
Exported settings allow each song to adjust the setting and reduces the need to create multiple states in the rack. Exported settings can often eliminate the need for rack states entirely.
Toggling Multiple Behaviours
Sometimes you might like to turn many state behaviours on or off and doing so one at a time would be tedious.
To toggle multiple behaviours on/off all at once, first select the behaviours to updated (using Shift or Control Click or Shift + arrow keys) and press Enter.
To toggle the exported state using Control+Enter.
Linked States
Sometimes it can be useful to create two or more identical states. For example if your song has multiple choruses or verses you might like to create a set of states to represent the sequence of song parts, but each verse and each chorus might be the same.
To support this, Cantabile provides "linked states". Linked states each have their own name and program number, but the underlying saved state is shared between them.
If you make changes to a state, any linked states are also updated.
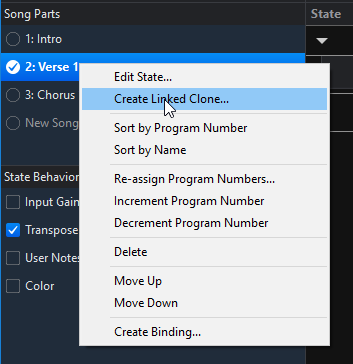
To create a linked state, right click on the original state in the states panel and choose "Create Linked Clone".
Linked states are indicated by a small link icon each state that is linked to the currently loaded state.
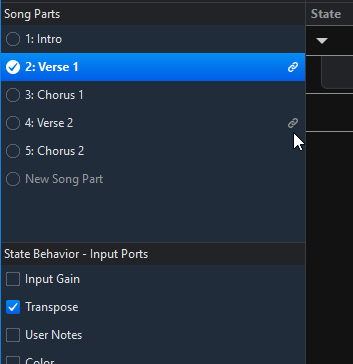
In this example, "Verse 2" is a clone of "Verse 1" as shown by the link icons. The "Chorus 2" state is also a clone of "Chorus 1" and would be indicated when either of the chorus states were selected.
Non-Linked Behaviours
Occassionally you might want to have states where most of the settings are identical, but just one or two settings different.
eg: in the above example linked states were created such that "Verse 1" and "Verse 2" has identical settings. Usually you'll want the same sounds for each verse, but you might want different show notes displayed for each (ie: different lyrics shown for each verse).
In this case you can unlink just the show notes so that each state will have different settings for the show notes, but everything else will be shared.
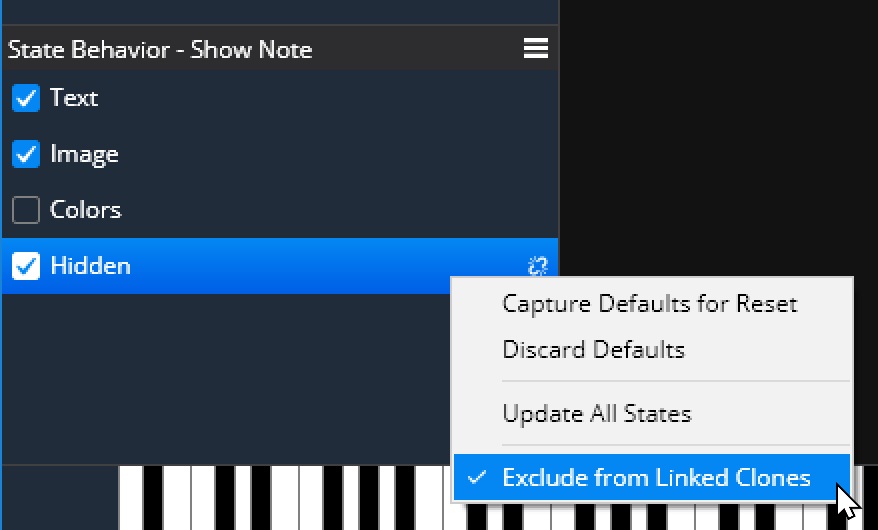
To unlink a behaviour:
- Select the object (eg: a show note)
- Right click on the State Behaviour
- Choose "Exclude from Linked Clones"
Once selected, those settings won't be shared across linked clone states and each linked clone will maintain its own settings for the selected behaviour.
Note that this Exclude setting is also captured by the default state behaviours so if, for example, you want all show notes to be excluded from the linked clones you can configure a note with those exclusions and then capture the default state behaviour as described below.
Changing the Default State Behaviours
Each kind of state controllable object has a default set of state behaviours that are enabled for new instances of those objects.
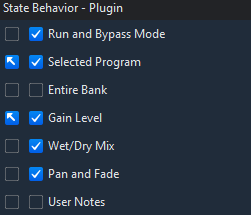
For example, each time you add a new plugin to a song it has the following state behaviours enabled: Run and Bypass Mode, Selected Program, Gain Level, Wet/Dry Mix and Pan and Fade.
You can change which behaviours are enabled on new objects by configuring an existing object the way you want the defaults and then choosing "Set As Default Behaviour" from the State Behaviours panel menu:
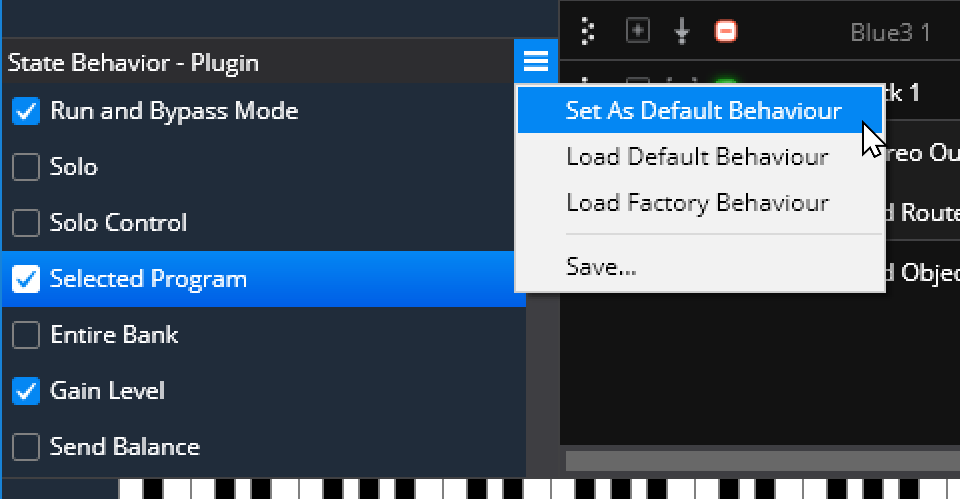
In the above example, from now on all new plugin instances will only have the Run and Bypass Mode and the Gain Level behaviours enabled.
Note that for plugins, you can't configure the default state behaviour for the plugin specific parameters (since all plugins have different parameters). ie: You can only control the default state of the non-numbered behaviours at the top of the list.
Lots more
This quick walk-through has only really skimmed the surface of what can be done with states. There are many attributes that can be controlled by states. For example:
- Try selecting different plugin presets in different states
- The transpose and keyboard split settings of a MIDI route can be controlled by states
- States can control the metronome's tempo and time signature
- You can completely unload a plugin in some states if they're not needed. (Right click the plugin slot and set it's run state to unloaded).
The main thing that states can't control is the existance of objects. ie: all states have the same set of plugins, routes etc... eg: if you insert or delete a plugin, it affects all states - not just the active one.
To check which attributes of an object can be controlled by states select the object and check the State Behaviours panel.
Other Editing Commands
Other useful state editing commands include:
- Press Ctrl+Up/Down or use drag/drop to re-order list items
- Press Delete or use the Edit|Delete menu command to delete states
- Press F2 or use the Edit|Edit State menu command to rename a state
- Undo and Redo commands also work with state editing.