

Recording
Cantabile Solo and Cantabile Performer Only.
Cantabile supports audio and MIDI recording, including automatic recording where the recorder starts and stops automatically as you play. Cantabile can be left in auto record mode and it will capture everything you play.
This video walkthrough also demonstrates working with the recorder.
Selecting what to Record
The recorder captures audio and MIDI data from a set of input and/or output ports that you select. For example you might choose to record incoming MIDI from your main keyboard as well as audio sent to the speakers.
To select the ports that should be recorded, from the View menu, choose "Recorder Ports". This will show a small panel at the bottom of the recordings list where you can choose which ports to record.
- Place a checkmark next to any ports that should be recorded
- Select the green LED indicator to arm the port for auto-recording
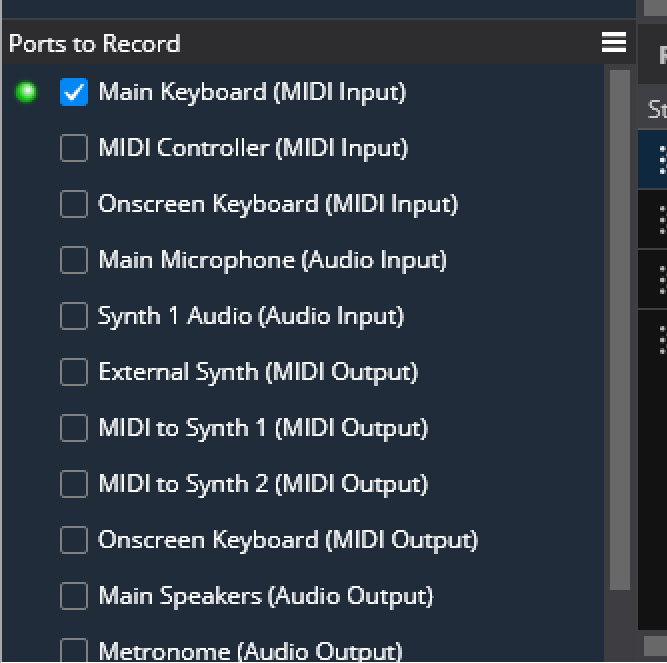
Note that a port doesn't need to be connected to a physical device to record it. This can be handy to record signals from inside the song - create an audio or MIDI output port, leave it disconnected, setup a route to send the signal to be recorded and then select the port in the recording ports list.
Manual Recording
To start recording, click the Record button on the main toolbar, use the shortcut key ('R' by default) or choose the "Record" command from the "Control" menu.
Recording will continue until you stop the recording by pressing the Record button again. Once the recording has completed, a new entry will appear in the recording list.
Recordings with a duration of less than 5 seconds will be discarded. You can adjust this duration in Recording Options.
Automatic Recording
To enable automatic recording, from the Control menu choose "Auto Record", or right click on the Record button on the main toolbar and choose "Auto Record".
When auto-record is enabled, a green ring around the record button will light up.

For a port to be monitored for activity, it must be both selected for recording and armed for auto recording.
Auto record will stop recording after 5 second of silence. When monitoring audio ports, there is a noise threshold setting that can be used if ambient noise is triggering the audio recorder. Both of these settings can be adjusted in Recording Options.
Recording Files
Each recording will be saved as one MIDI file and one Audio file (unless no ports of a particular type are enabled).
For MIDI files each port selected for recording will be written to a separate MIDI track. The track will be named using the port name.
For Audio files each port will be written as a consecutivie set of channels. For example, if you have two stereo ports selected the resulting wave file will have four channels.
Pinned and Unpinned Recordings
In the list of recordings, each recording has a "pin". Unpinned recordings will be deleted after 7 days (adjustable in Options). Pinned recordings are never automatically deleted.
By default all recordings are pinned and will be kept indefinitely. In Recording Options, you can choose to not pin new recordings. In this case all recordings will eventually be automatically deleted - unless you manually pin them.
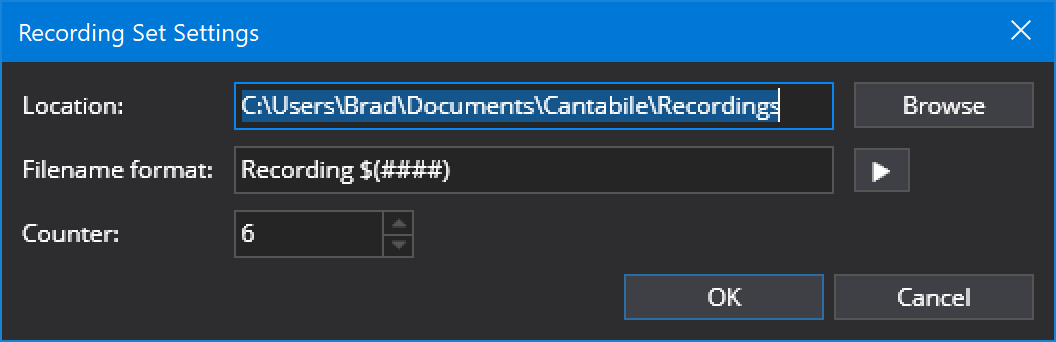
Recording Sets
The list of recordings shown in the recordings tab is saved as a "Recording Set".
A recording set includes:
- The list of previous recordings
- The set of ports to record
- The set of ports armed for auto-record
- A set of properties that control where to save the recordings, filename formats etc...
To adjust the recording set properties, from the recording panel menu choose "Recording Set Properties":
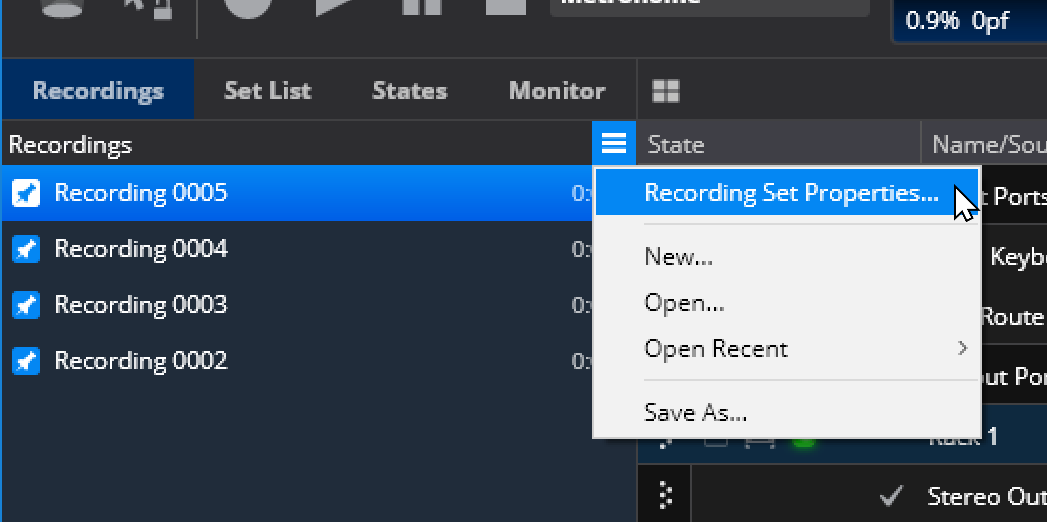
You can also use this menu to create new recording sets or load previous recording sets.
Recording sets have the following properties:
Per-Song Recording Sets
Usually Cantabile will keep the same recording set open regardless of the currently loaded song file.
If you'd like to create separate recording sets for each song, go to Tools → Options -> Recording and enable the option "Automatically create a new recording set for each song".
When enabled each time you create a new song, or open an existing song and start a recording a recording set will be automatically created for that song.
Working with Recordings
The recordings list shows a list of all previous recordings. You can use this list manage your recordings. The right click context menu includes commands to rename, delete, re-order and launch Windows Explorer with the recording selected.
There are also commands to delete all unpinned recordings as well as to clear the list without deleting recordings.

Recording Filenames and Locations
You can change where recordings are saved and the name of recording files in Options.
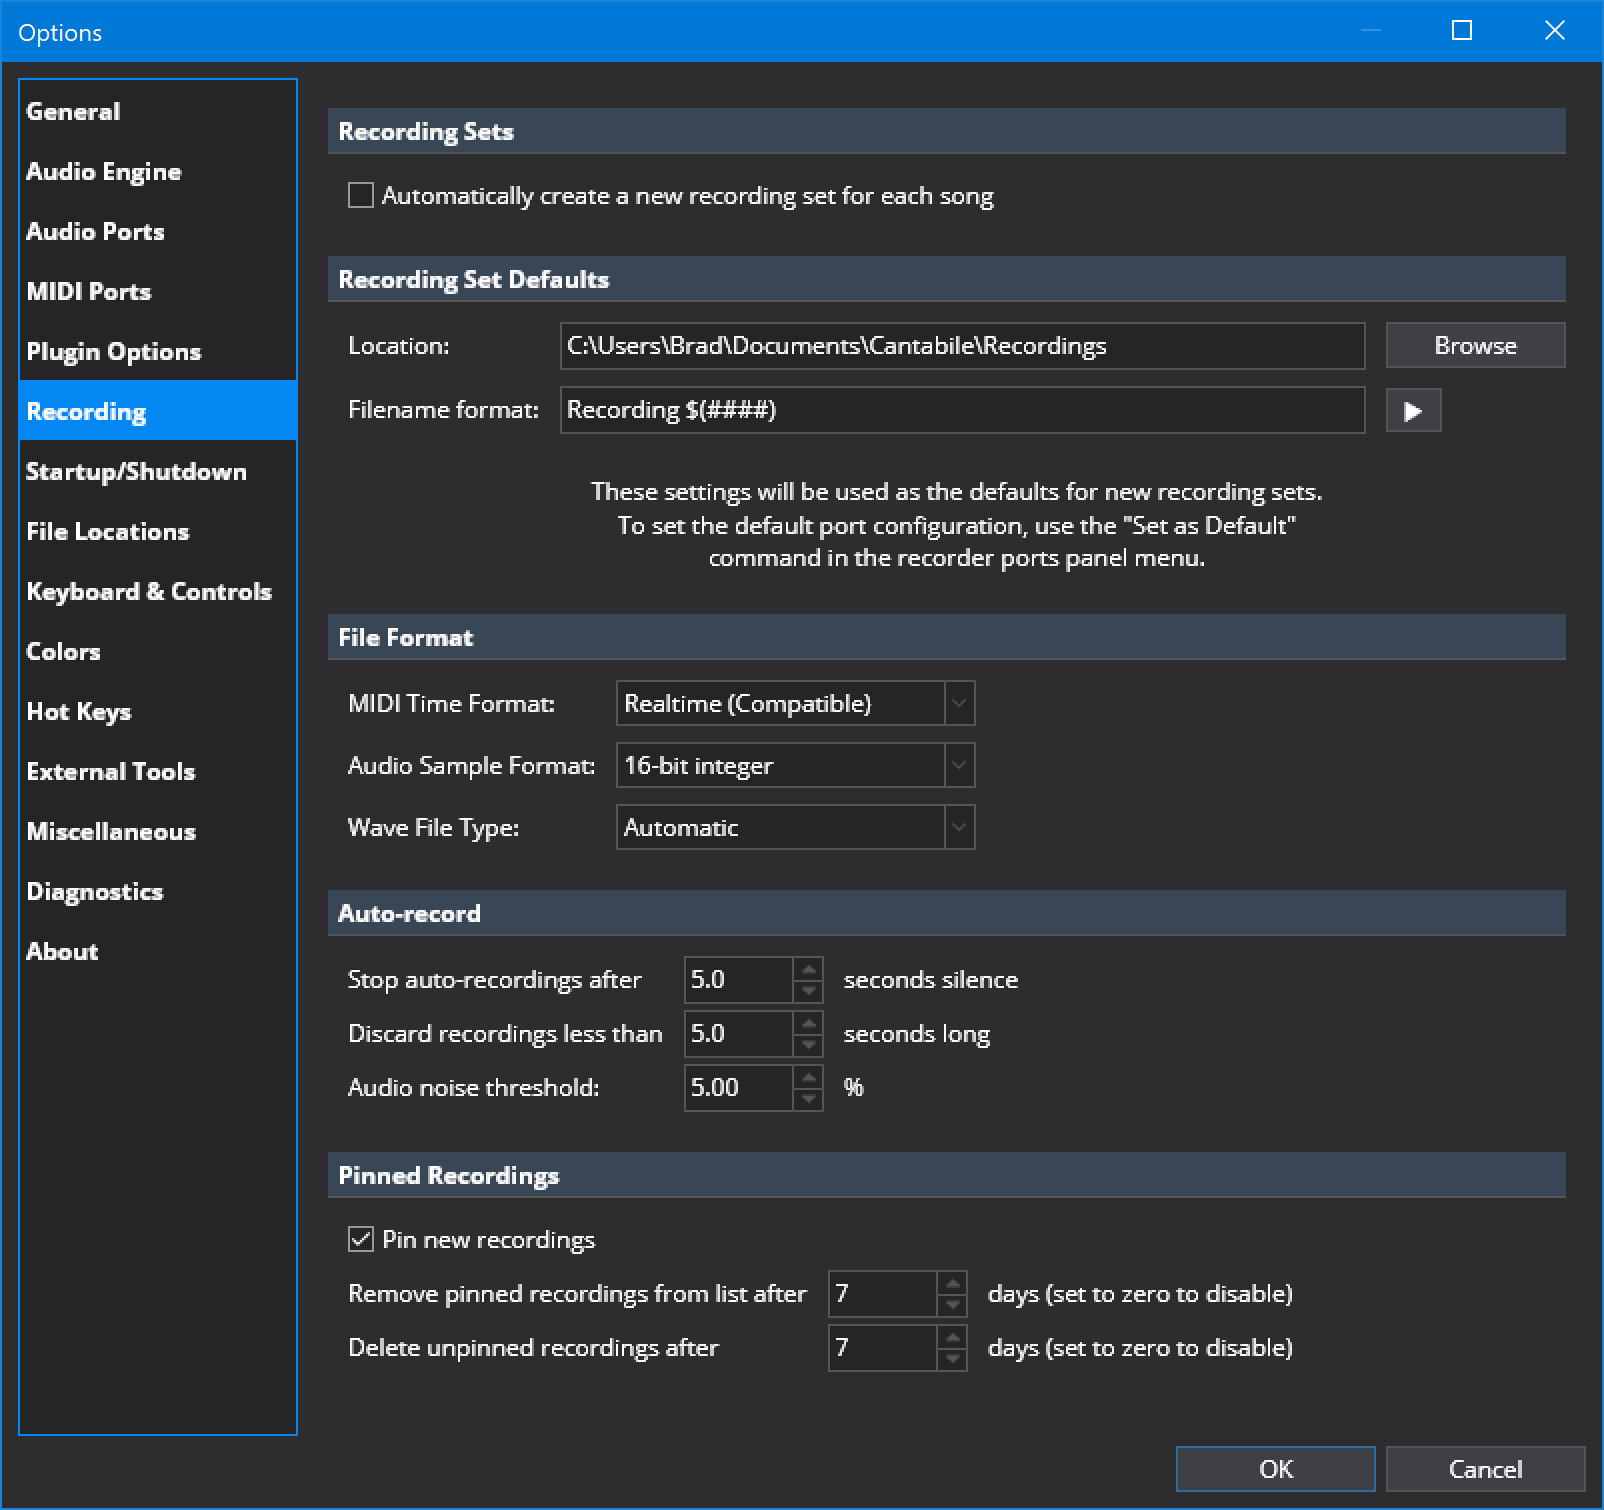
Note: the "Recording Set Defaults" section sets the defaults for how new recording sets are created - it doesn't affect the currently loaded recording set.
MIDI Time Format Options
When recording MIDI, several different time formats are available:
- Realtime (Compatible)
-
This is the default recording format that is most compatible with other software. It records in real-time (ie: each event is timestamped with millisecond accuracy). Tempo and time-signature information isn't captured in this mode.
- Realtime (SMPTE)
-
This format is very similar to Realtime (Compatible) except the file is marked as SMPTE time format. This is a more correct format for this type of recording but some software programs don't support it.
- Musical (Relative) and Musical (Absolute)
-
In these formats events are timestamped using musical time format.
-
This format is best for importing into other software programs where maintaining correct musical time is more important than millisecond accuracy. In this format the tempo and time signature of Cantabile's master transport is also recorded (even if it changes during the recording).
-
In "relative" mode events will be timestamped such that the recording starts just before the first recorded events. In "absolute" mode events will be timestamped using the exact time of the master transport.
To better understand the difference between relative and absolute modes, consider this scenario: suppose a recording is started when the current master transport is at bar 50 (perhaps because the metronome has been running for a while).
-
In absolute mode, the recording would have 50 bars of silence at the start.
-
In relative mode, the recorded events would be at the start of the recording.
Note that the musical recording formats require a running master transport. If the master transport isn't playing when the recording starts, the recorder will automatically start it (if it can). Similarly, if the master transport stops while a recording is in progress, the recording will also stop.
Bindings
The recorder can be externally controlled using Bindings.
ie: you can assign buttons on your keyboard to start/stop recording, enable/disable automatic recording, pin/unpin the last recording etc...
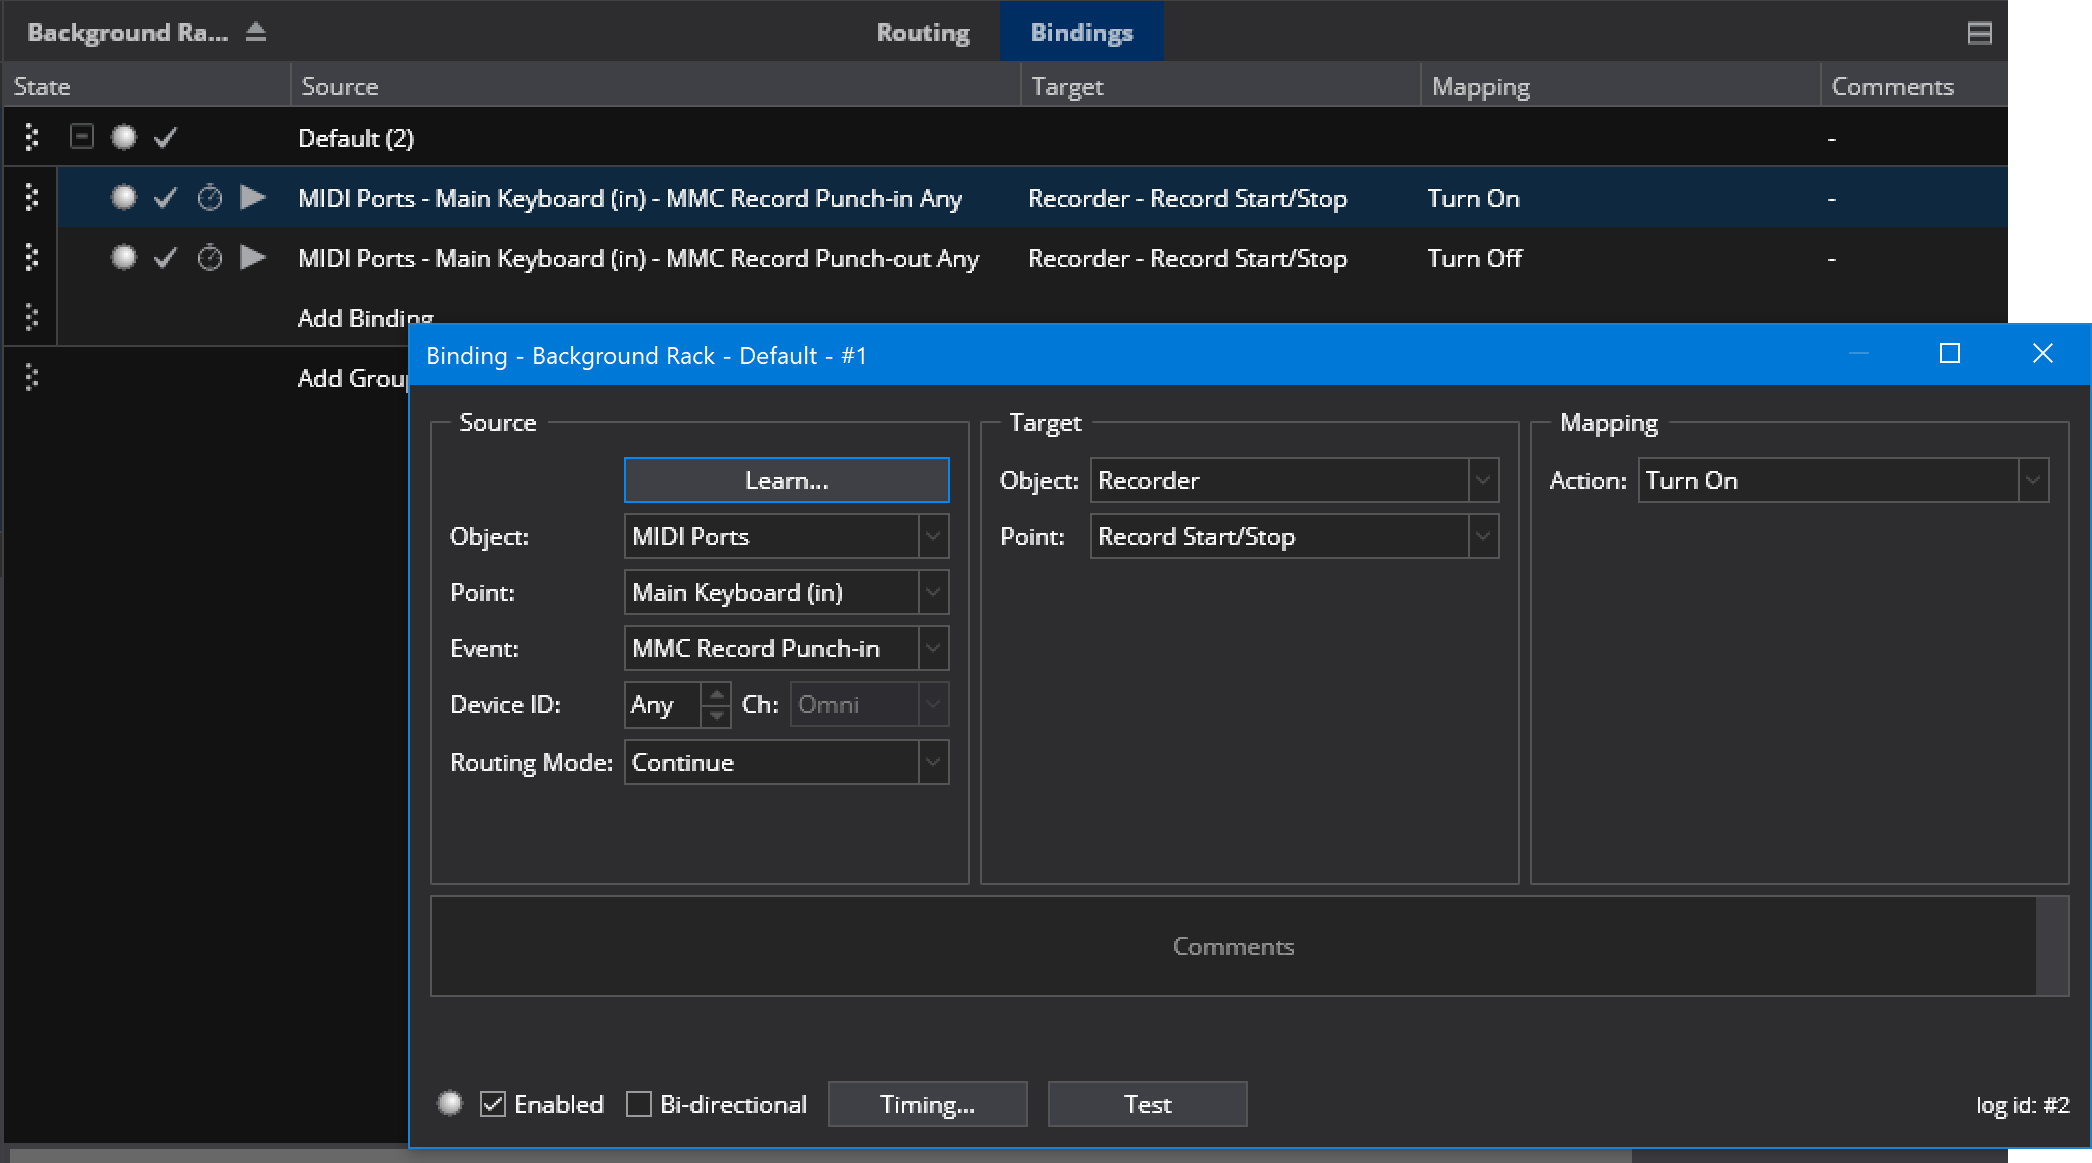
See Bindings for more.