

Performance Profiler
Cantabile includes a comprehensive Performer Profiler to provide deep insight into which parts of the audio processing pipeline and/or plugins might be causing load and performance issues:
Accessing the Profiler
The Profiler is available from the View menu... View → Profiler.
Profiler History
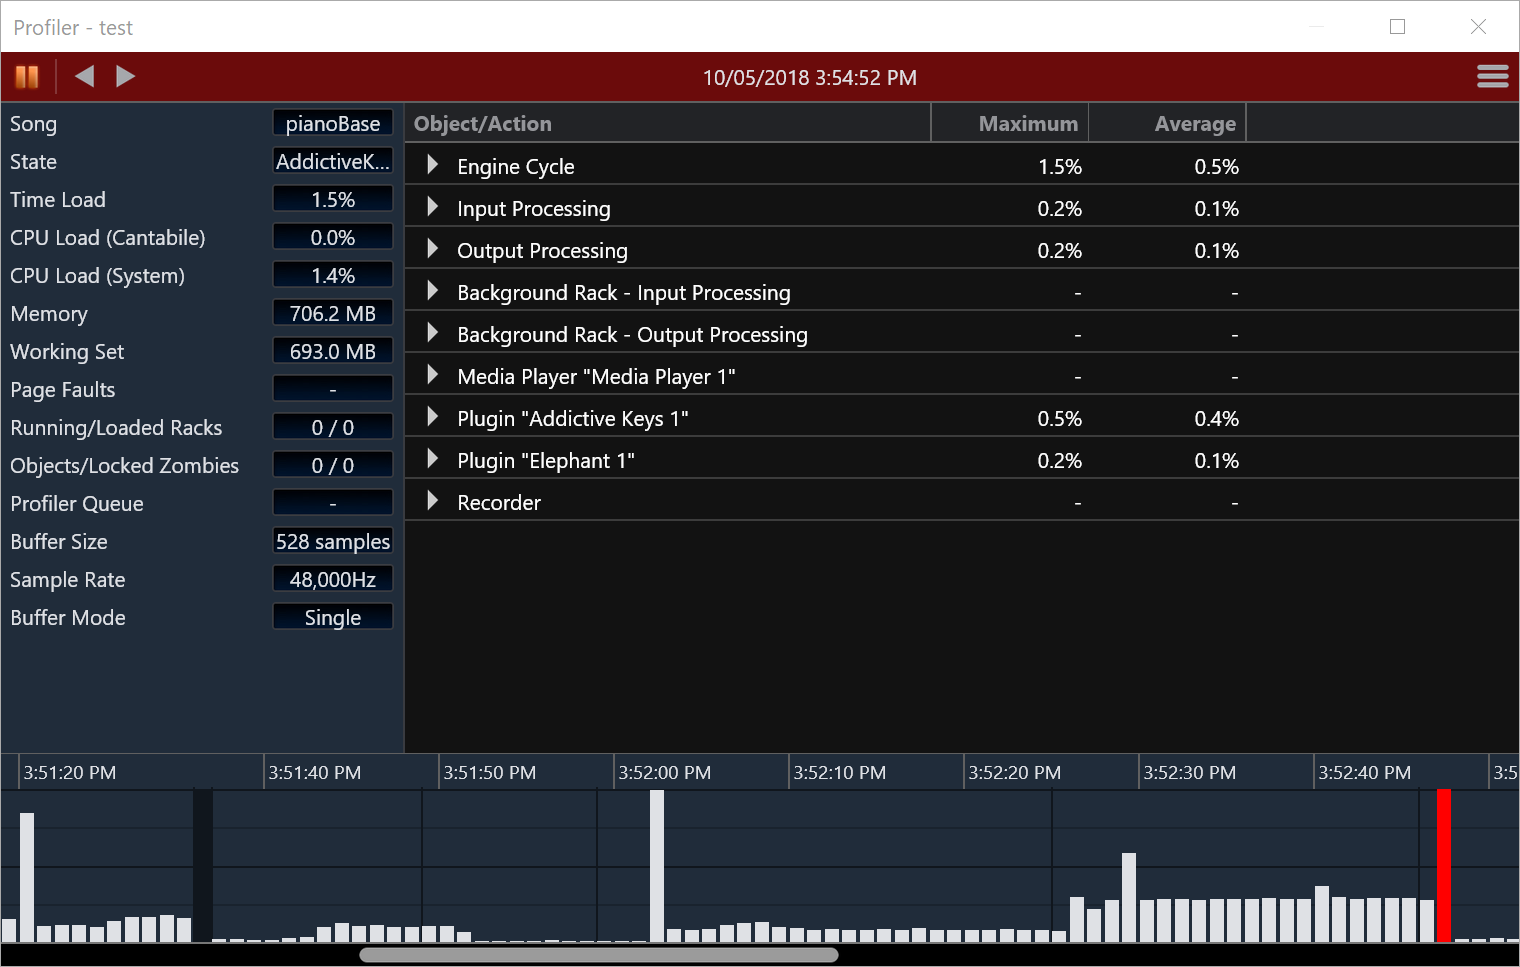
The profiler records a history of audio engine processing for the previous five minutes. The graph at the bottom of the profiler displays a histogram bar for each one second interval over the recorded period.
To see a detailed breakdown of a particular one second interval:
- Click on that bar in the graph.
- The real-time updating of the profiler will pause and the side panel and detail view will show what happened during that period.
- Switch to other intervals to investigate other possible issues.
- Press the Pause button (top left of Profiler window) to return to real time profiling data.
You can also navigate through the profiler history using the Left and Right arrow keys.
Other Graph Indicators
The profiler graph also shows:
- a fine vertical line where the currently loaded song or song state changed.
- a thick vertical black bar where the audio engine was stopped or profiler was disabled.
- red bars for any interval where the time load exceeded 100%
Side Panel Metrics
The side panel displays metrics for the currently selected interval. These metrics essentially match those displayed in the main Monitor Panel.
Detail Panel
The main content area of the profiler displays a break down of each operation that the audio engine performed during that one second interval. The displayed percentages are calculated as a time percentage of the audio buffer length (see Understanding Performance Metrics for a more detailed explanation of this).
Each top level row in the detail panel represents a single audio engine "Work Item". Each work item is a task that was scheduled to execute on one of the audio engine's worker threads. Since these items can execute in parallel the total percentages of these items might exceed the time load percentage of the audio cycle as a whole - this is because these work items can execute in parallel.
Note too that since the displayed interval is an aggregate of all audio cycles processed during a one second interval sometimes you'll see plugins from two different songs in the same interval. This means that at the start of the interval one song was processing while at the end of interval the other song had loaded and started processing.
When the profiler detail level is set to anything higher than Normal you can expand each row in the detail view to get a breakdown of other operations. Any sub-items of the root items are displayed in execution order. Even so, sometimes the displayed rows might be somewhat unintuitive (or duplicated entries). This is a side effect of the profiler coalescing multiple audio processing cycles in to a single one second interval.
Exporting Profiler History
Sometimes it might be necessary to send a profiler log to Topten Software for analysis. To do this, from the menu button at the top right corner of the profiler window, choose "Save" to export the history.
You can also re-import a previously saved profiler history using the Open command. To close a previously opened history file and return to real-time profiler data, just click the Pause button.
Profiler Settings
The profiler has a couple of settings you can adjust via the Options → Diagnostics page:
- Detail level - adjust this to provide a more detailed breakdown of profiler timing
- History Length - how much history to keep (5 minutes to 2 hours).
Usually the "Normal" detail level is enough however if you're trying to diagnose a specific issue, turning up the detail level can provide additional insight (at the possible expense of additional processing load).
Note that profiler history is kept in memory - the longer the history the more memory will be used. Be careful setting this to a large value when the detail level is also turned up.