

Routing Diagrams
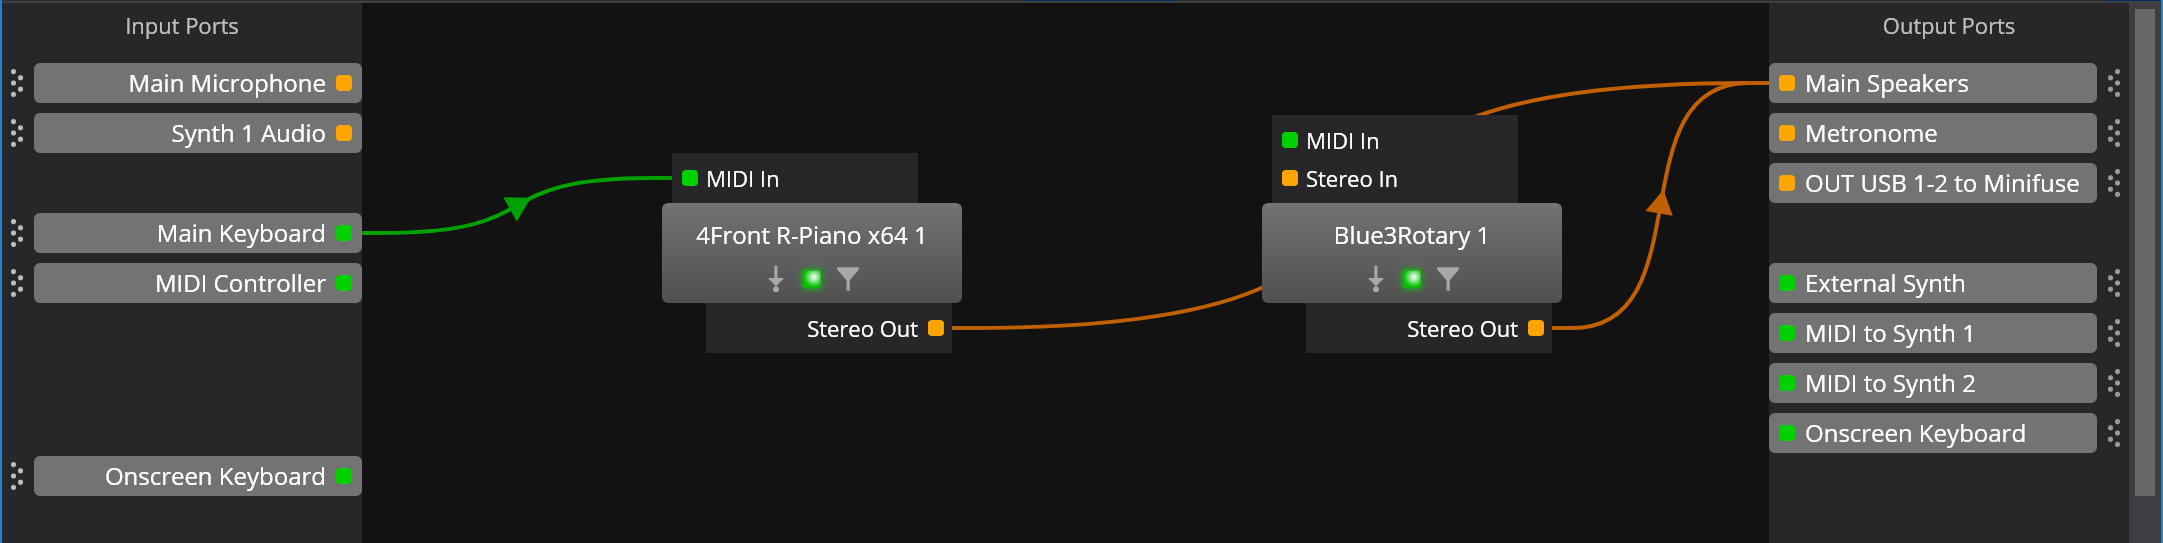
Routing Diagrams provide a more visual way to view and edit the routes in a song or rack:
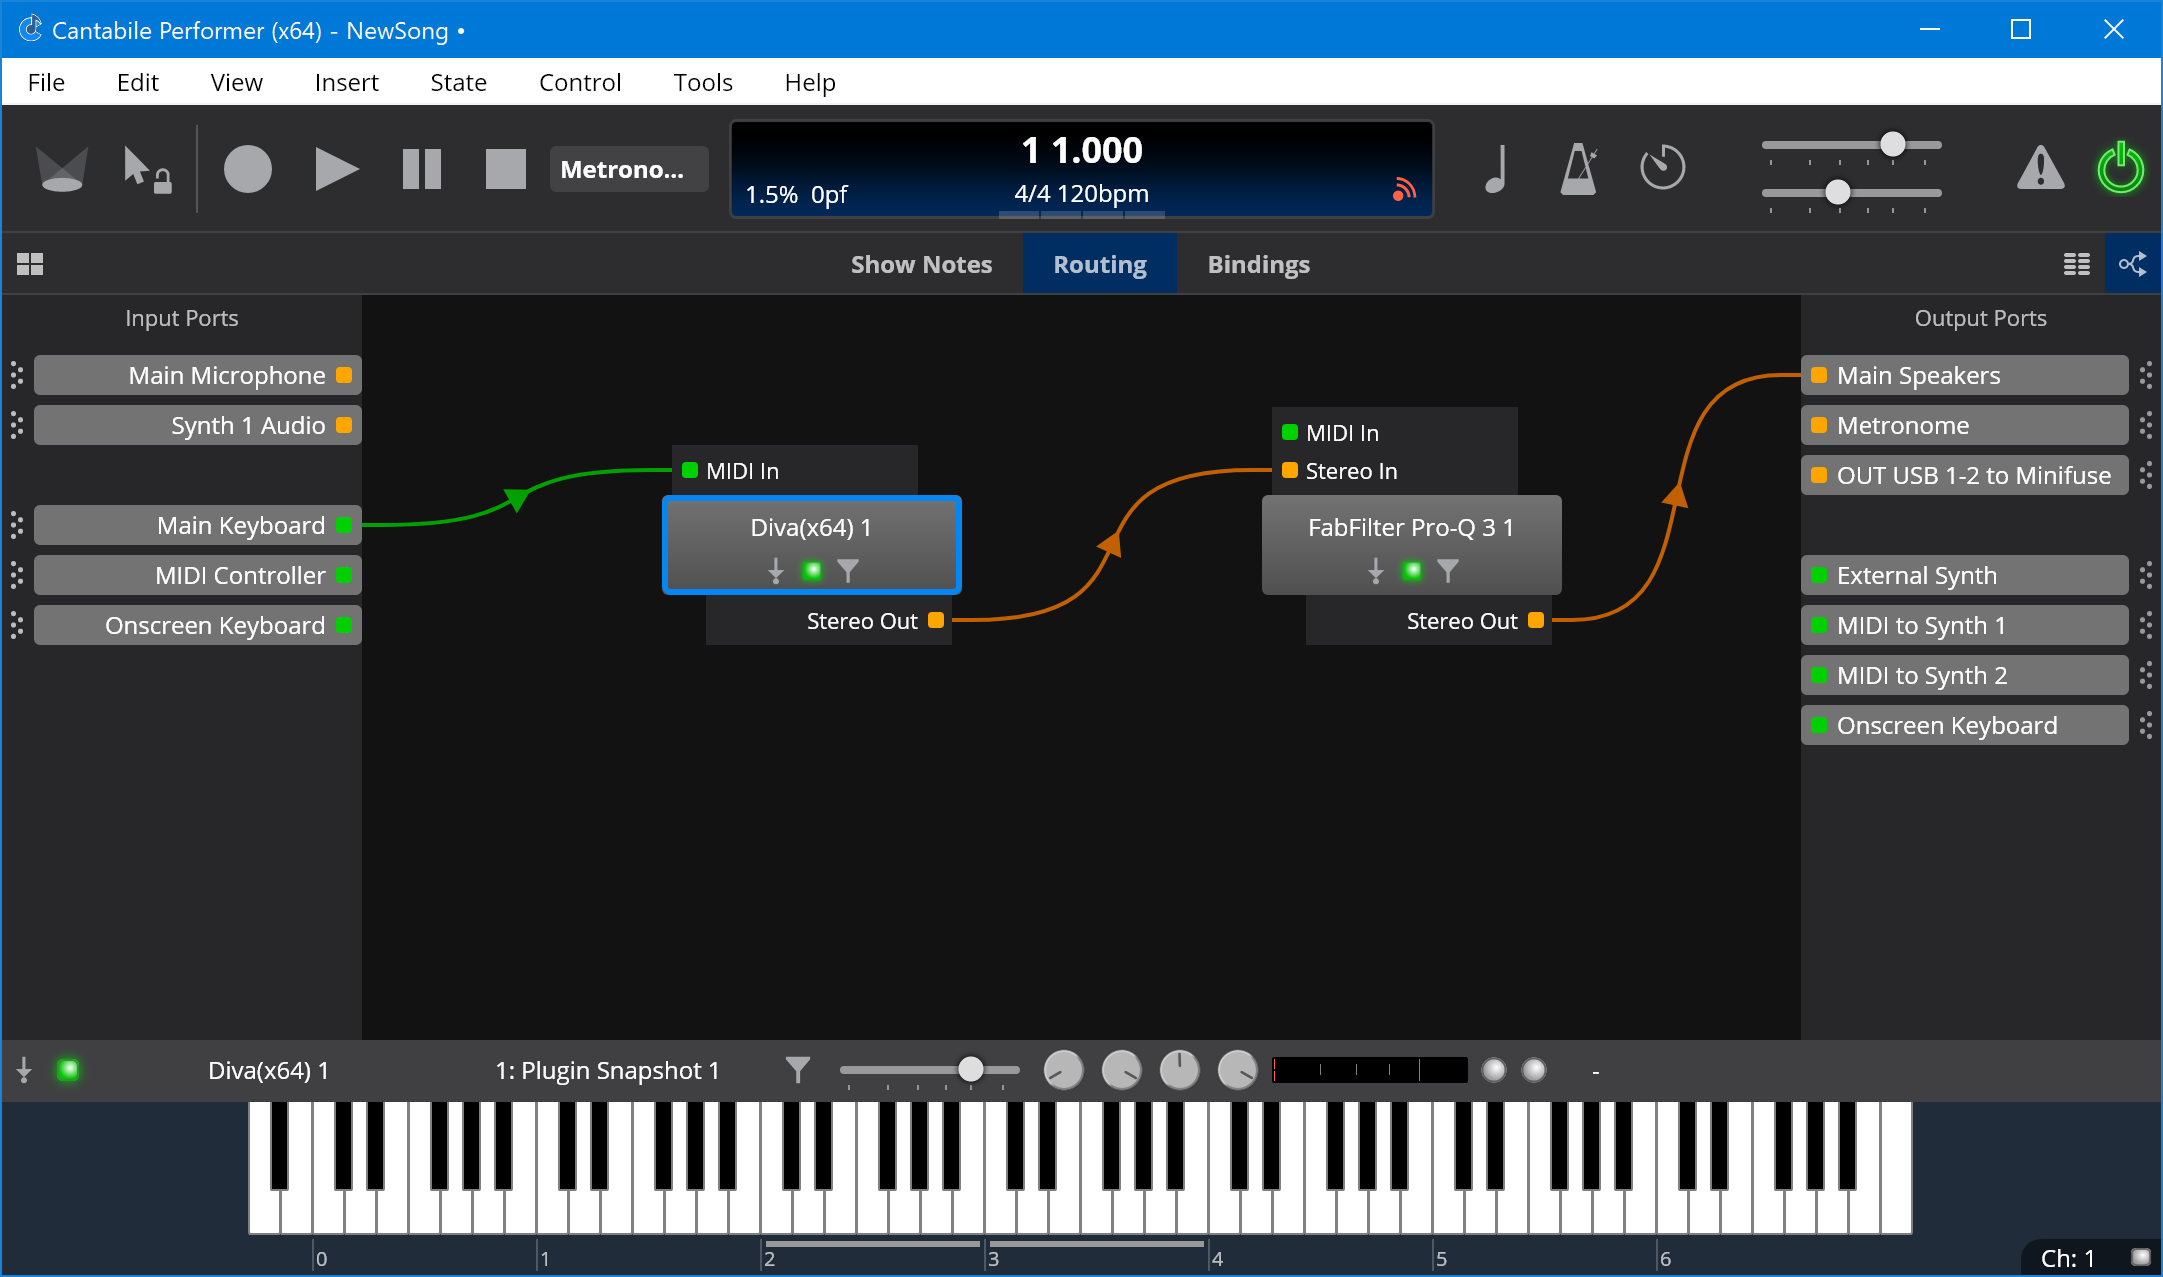
As can be seen in the above screen shot, the routing view is divided into three main areas:
- Input Ports on the Left
- Output Ports on the Right
- Objects and Routes in the Middle
Switching Between Table to Routing Diagrams
The table view and the routing diagram views both show the same set of objects and routes. You can switch between the two views using the view selector buttons at the top right hand corner of the screen:
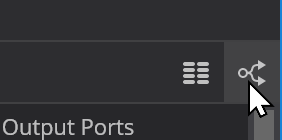
You can also switch views via the main View menu, or pressing Ctrl+Shift+X will toggle between the two views.
Adding New Objects
The easiest way to add a new object to a routing diagrams is via the large "add" buttons. When the routing view is empty, a single centered add button always appears:

After you've added the first object, add buttons will appear in grid locations as you move the mouse around the screen:
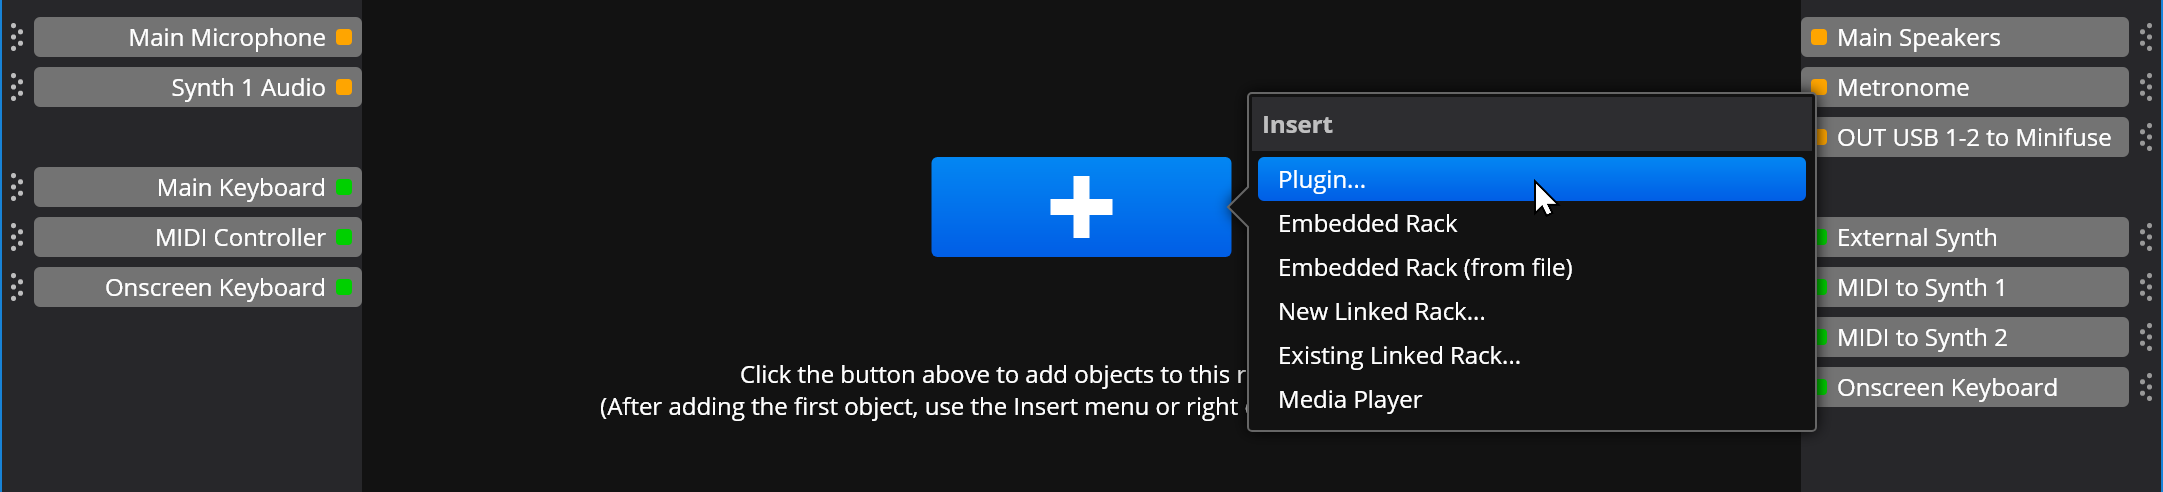
You can also add objects by right clicking in a blank part of the diagram, or via the main Insert menu.
Creating Routes
Routes are represented as wires that connect between ports.
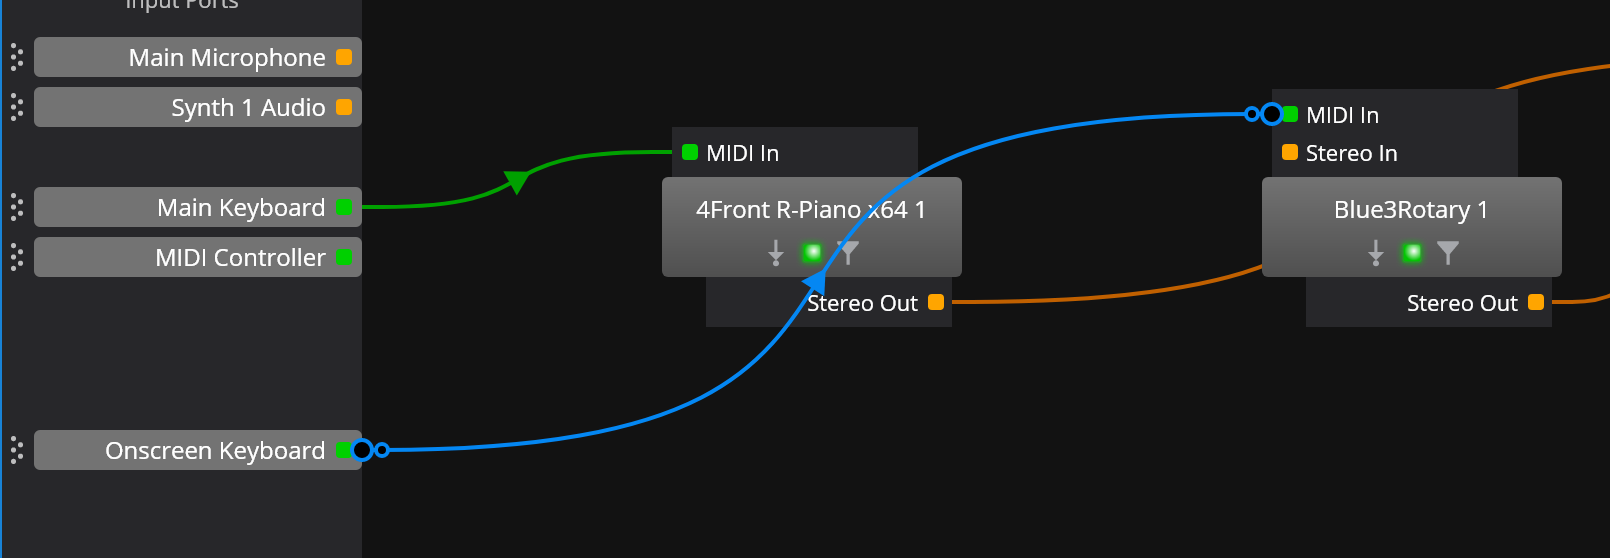
To add a new route, click on any port and drag it to another port. Here a route is being added by dragging from the "Onscreen Keyboard" port and connecting it to the "MIDI In" port on a plugin:
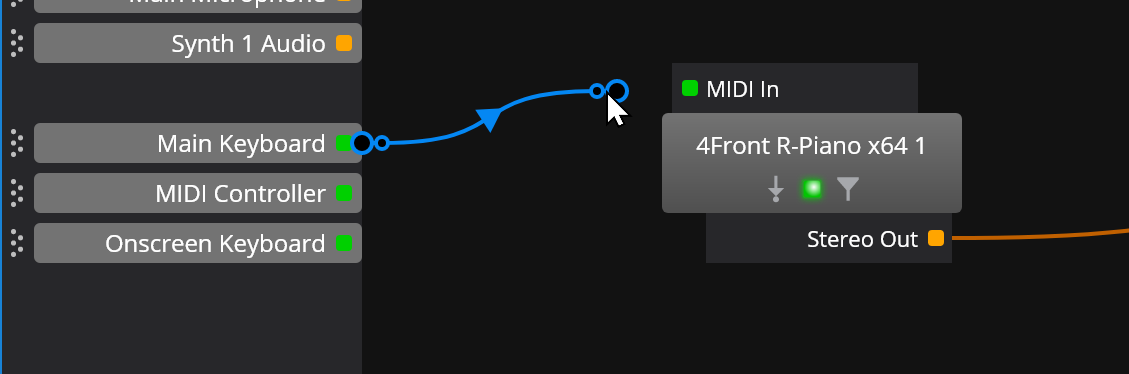
Note that you can only connect MIDI ports to other MIDI ports and audio ports to audio ports.
Editing Routes
To edit an existing route, select it by clicking on it and then use the round handles at either end to move the connection to a different port:

Deleting Objects and Routes
Any object or route can be deleted by selecting it and pressed the Delete key.
Moving Objects
Often you'll want to reposition objects in the diagram to make it more visually pleasing. To do this, click on the object and drag it to the new location.
By default objects will "snap" to predefined grid locations in the diagram. You can suppress this snapping by holding the Shift key as you drag the object. (Press Shift after starting the drag otherwise you'll start a pan action - see below).
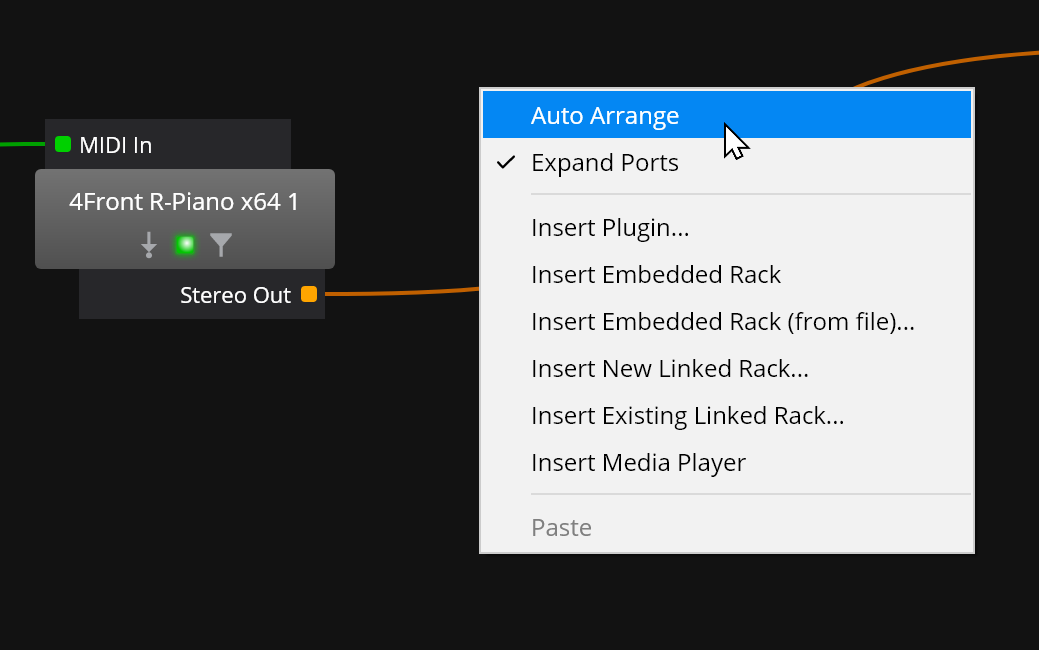
Auto Arrange
Cantabile can automatically arrange the objects in a routing diagram to provide a pleasing layout. To auto arrange a routing diagram, choose Auto Arrange from the right click menu, or press A.
Auto arrange can be handy if you've added new objects using the Table View and Cantabile doesn't have a concept of where you'd like the object displayed in the diagram. In this case Cantabile will try to pick a reasonable position, but depending on how routes have been subsequently added the layout may not be ideal.
Note that Auto Arrange will reposition all objects. Don't use this command if you've already precisely laid out the diagram in a preferred manner.
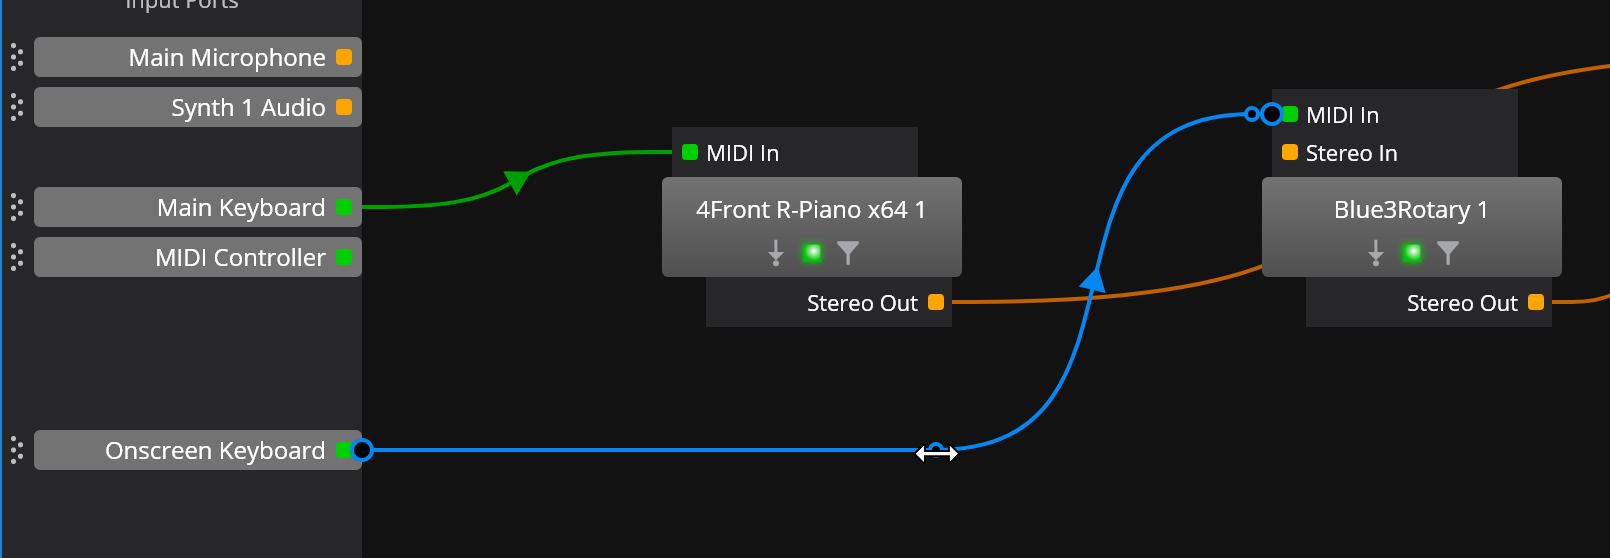
Reshaping Routes
Sometimes you might like to reshape a route.
For example, this route overlaps with an unrelated plugin:
By using the smaller inset handle on the route, it can be reshaped to be more visually pleasing:
Object and Route Settings
Along the bottom of the routing diagrams is a settings bar that shows settings for the currently selected object:
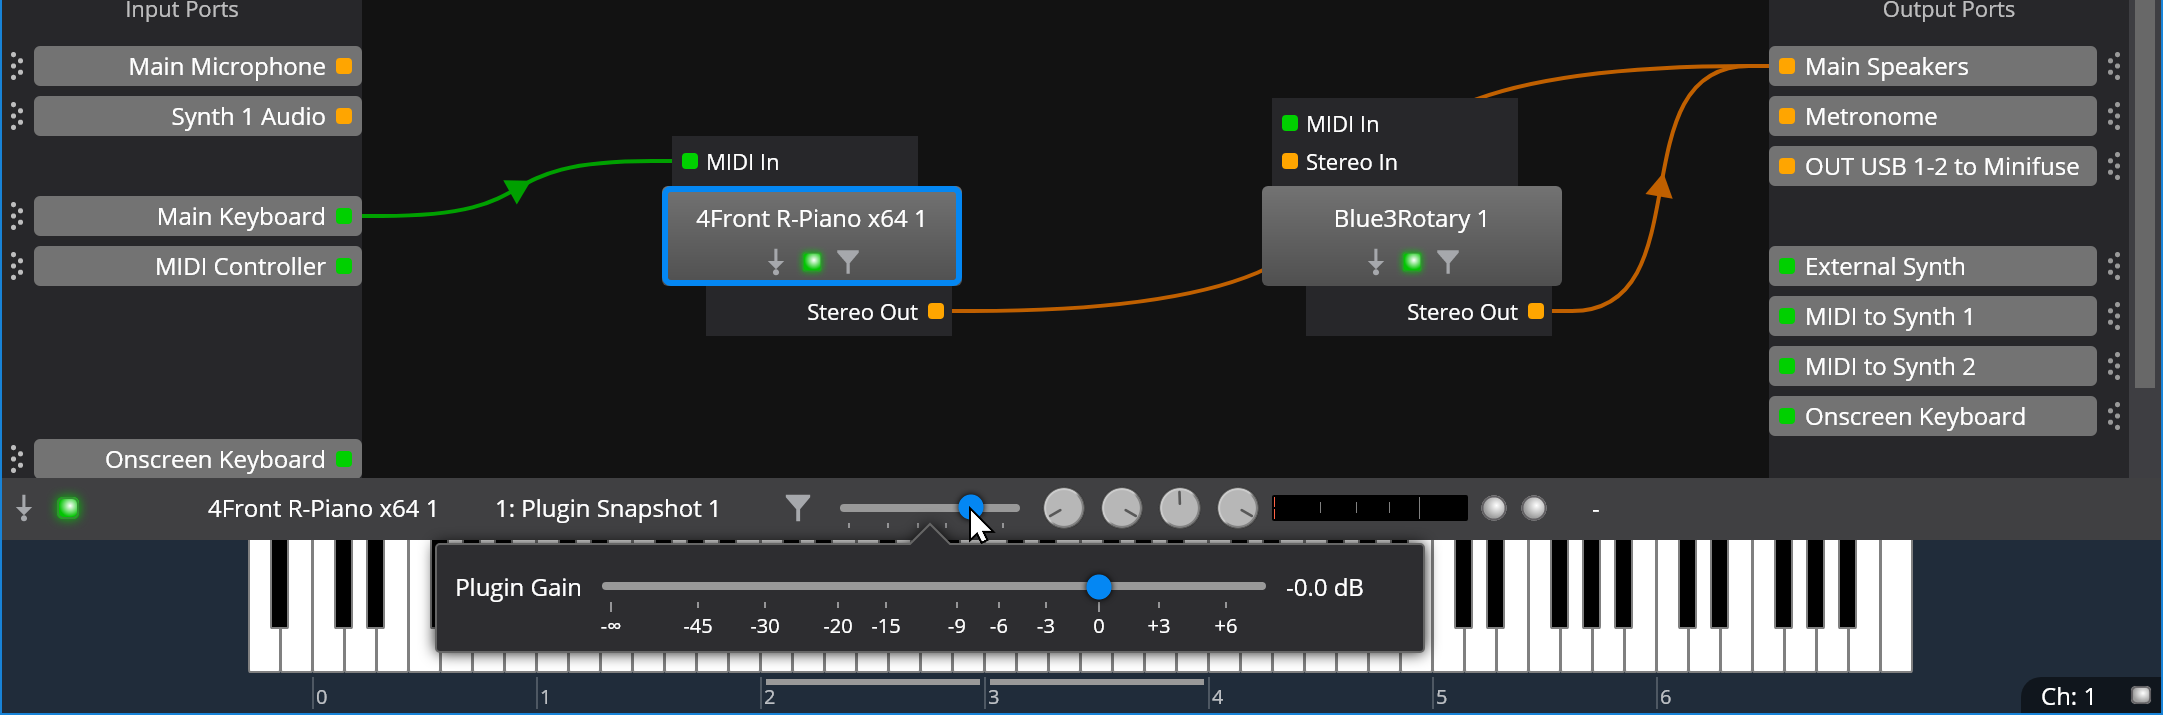
This bar very closely resembles the same settings in the table view.
Hiding Object Ports
By default, the routing diagram shows the ports on each object. While this provides the most detail and is best when setting up a song, sometimes it can make the diagram appear more complex than it needs to be.
For a simpler view, press the Tab to toggle object ports on and off.
Here's a routing digram with ports shown:
Here's the same diagram ports turned hidden:
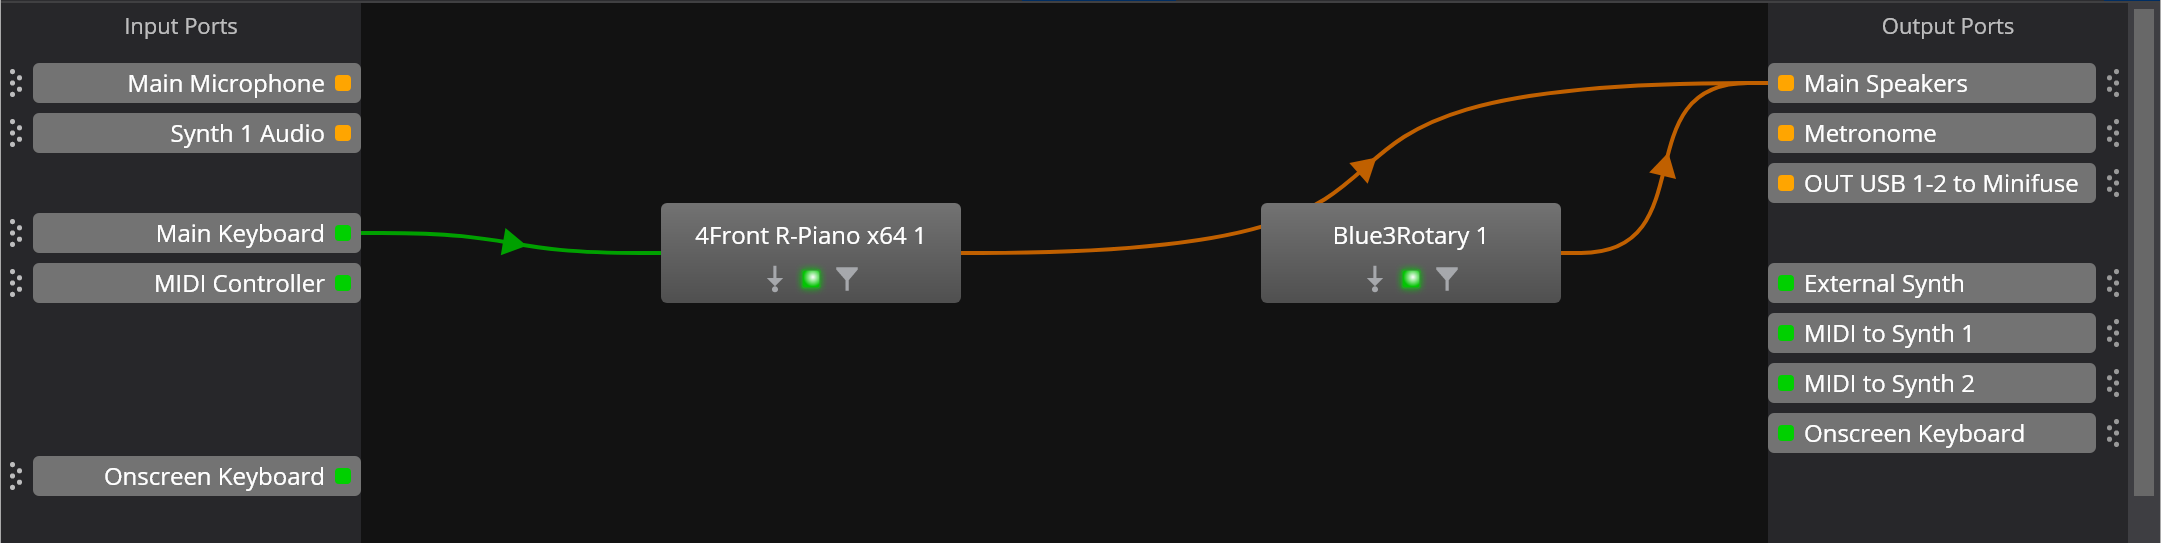
While the ports are hidden, you can still interact with them as they temporarily appear when the mouse is hovered over an object.
Selecting Multiple Objects
You can select multiple objects by:
- holding the Ctrl while clicking on each object or route
- clicking in a blank area of the diagram and dragging a rectangle around the desired objects (this will only select objects, not routes)
Multiple selection can be used to deleted multiple objects at once, or to move multiple objects as a group.
Zooming
Routing diagrams can be zoomed in/out as follows:
- Using the mouse wheel while pressing the Ctrl key
- Pressing Ctrl+Up and Ctrl+Down
- Using the View → Zoom menu
- On touch screens with pinch gestures
You can reset to the default zoom level by pressing Ctrl+1.
Scrolling
Scrolling (aka panning) the routing diagrams is supported by:
- Using the scroll bars
- Using the mouse wheel for vertical scrolling or hold Shift for horizontal scrolling
- Some track pads support both horizontal and vertical scrolling by two finger drag
- Shift+click and drag
Preferred Routing View
You can set your preferred routing view in Options → General → User Interface:
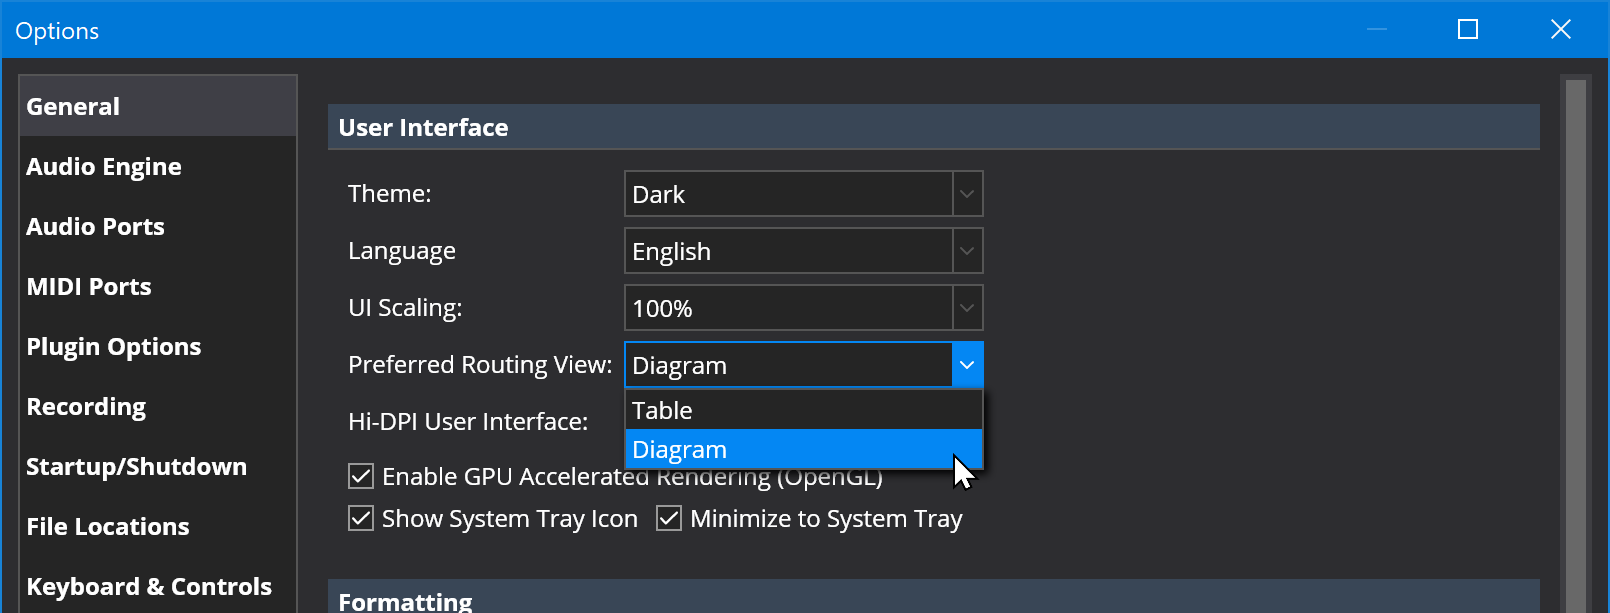
The preferred view is used to select which view (table or diagram) should be used for new songs and rack (and songs and racks created in versions of Cantabile saved before routing diagrams were introduced). Once a song or rack has been saved, it will store the current view and revert to that mode when the song is next opeen.
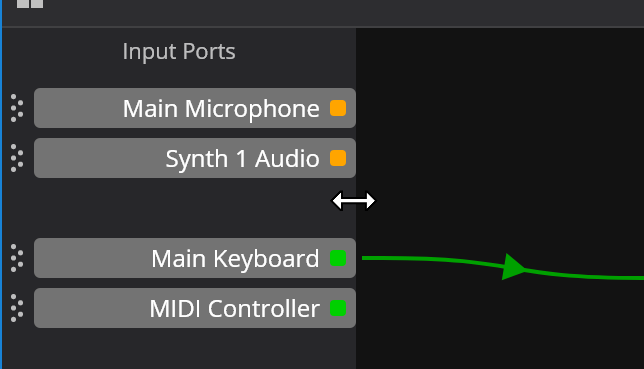
Input and Output Port Area
The input and output port areas can be resized by clicking and dragging on their border:
The input and output ports can be re-ordered and repositioned using the little gripper handles:
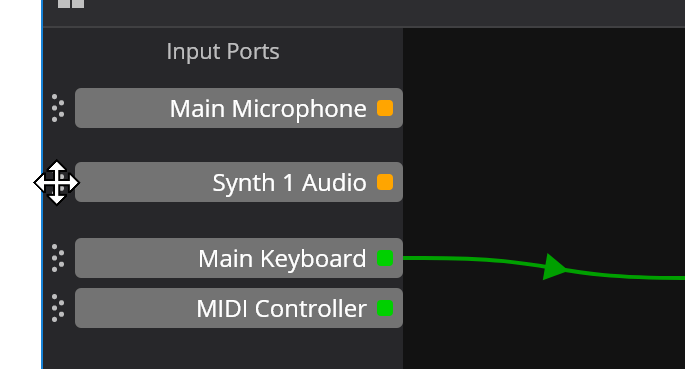
Tip: Holding the Ctrl key while dragging ports enters "push/pull" mode that makes it easier to insert and remove gaps between ports.
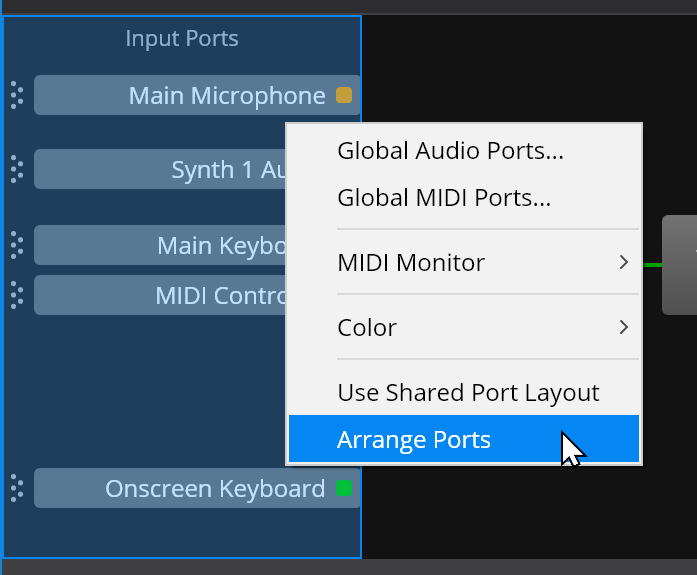
Right clicking on the input or output area provides commands for working with ports and the ability to auto-arrange the ports:
Shared Port Layout
To use the same input/output port layout for all songs and racks, you can enable the option "Use Shared Port Layout". This option is available on a per-song/per-rack basis and all racks and songs with this option enabled will use the same port layout.
