Adding a Hardware LED Tempo Indicator to Your Cantabile Rig
Using Cantabile's new "Tempo LEDs" binding to build an Arduino based tempo indicator or flasher.
Cantabile now includes the ability send tempo beat information as a MIDI event that can be used to drive a hardware LED tempo indicator using a simple Arduino project.
There's three main parts to getting this working:
- Cantabile Performer 's Tempo LEDs binding source
- The Arduino and LED hardware
- The Arduino program to listen for the events and drive the LEDs
Tempo LEDs Binding Source
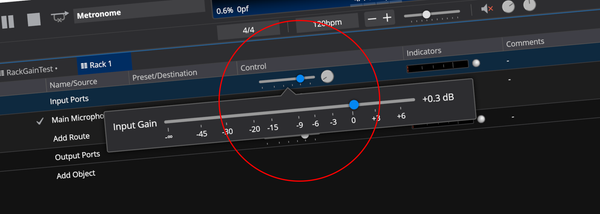
Starting with build 3677, Cantabile Performer includes a new binding point called "Transport -> Tempo LEDs" that encodes the current beat number and time signature numerator as a single value.

This encoded value can be sent to an external MIDI device with a binding like this:

For this example I've mapped the tempo LEDs to send MIDI CC 127, but you can configure this to something different if need be.
As mentioned, the Tempo LEDs binding source encodes two values:
- Bits 0-3 (ie: the lower 4 bits) contain the current beat number as a zero based number such that beat 1 (the downbeat) has a value of zero.
- Bits 4-6 (ie: the upper 3 bits) contain the current time signature numerator minus 2 allowing for a range of 2 to 9. A time signature of 2/4 maps to 0, 3/4 maps to 1, 4/4 to 2 etc...
This provides enough information to create a display that includes LEDs showing the number of beats per bar and the current beat number. Note that the time signature denominator is not included in the encoded value.
See the Arduino programs linked below for more details on decoding this event.
Arduino and LED Hardware
While there are various microcontrollers and programmable MIDI controllers that could be used, Arduino's are small, chearp, popular and easy to use so that's what I'll use here. If you're using a different controller you should be able to translate the rest of this post fairly easily to suit your needs.
Besides the Arduino itself you'll also need:
- A MIDI connection from your PC to the Arduino.
- An LED (for a tempo flasher) or a series of LEDs (for a tempo indicator).
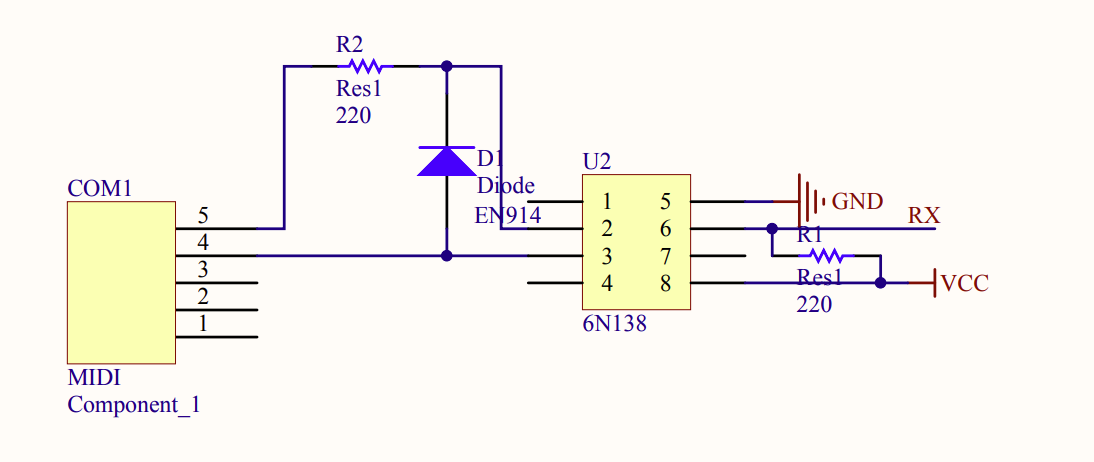
For the MIDI connection I used this Arduino MIDI shield from LinkSprite that I purchased through Jaycar Electronics here in Australia. There are other similar products to this, or you can create one yourself if you're happy to play with a soldering iron.
If you decide to build it yourself search online or use the schematic for the LinkSprite shield which is available here. Note, you only need the receive part of the circuit:
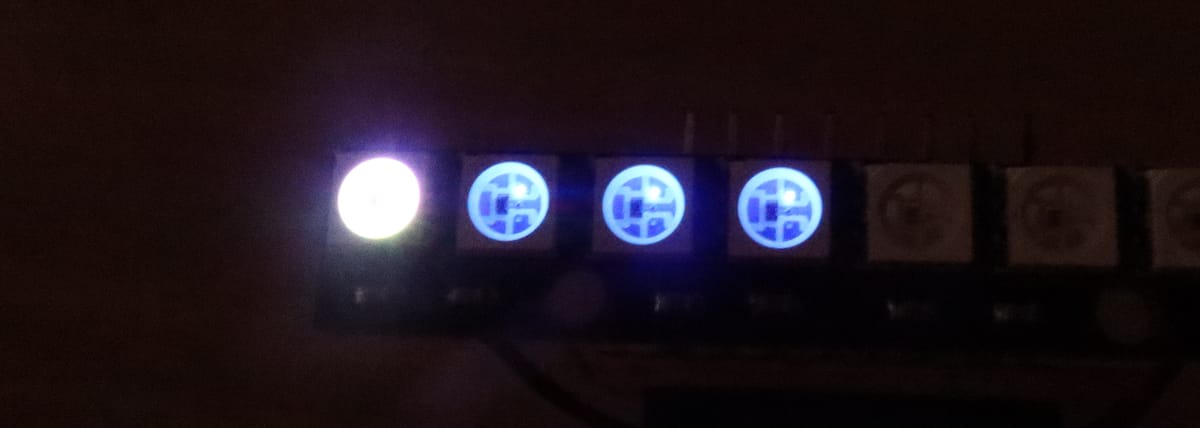
Next you'll need some LEDs to for the actual display. There's a number of choices here and you might want one of two different displays:
- A tempo flasher - a single LED that flashes in time with the current tempo.
- A tempo indicator - a set of LEDs that shows the current number of beats along with the current beat.
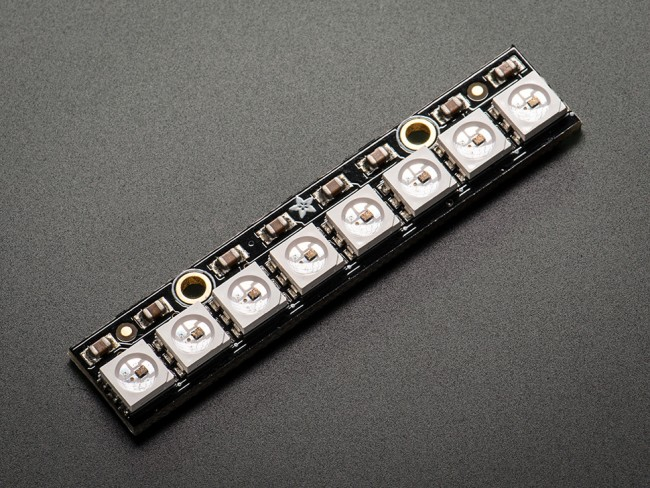
I used a 8-LED Neo-Pixel strip (similar to this one). For details on how to hook it up to the Arduino, see this Arduino tutorial.
The Arduino Program
The final piece to making all this work is a program to tell the Arduino what to do.
I've written two Arduino programs that work with the NeoPixel strip. If you're using a different LED configuration you'll need to adjust these accordingly.
Here are the programs:
- TempoFlasher.ino - single flashing LED
- TempoLEDs.ino - tempo and beat count indicator
I'm not going to explain how to compile and flash these to the Arduino as there are tons of other tutorials about this.
At the top of the each file you'll find various defined constants for the CC number and the LED colors that you can adjust to suit your preferences.
Putting it All Together
Here's a video showing it all working together (sorry for the quality, I recorded this one-handed on a phone camera so it's a bit shaky). Note that the metronome sounds are directly from Cantabile and not part of this project - they're included just to show that Cantabile and the LEDs are in-sync.
If you build a project based on this, I'd be interested to see the final result - either email me, or post a comment with some photos!