Using Cantabile as a Standlone Onscreen Keyboard
Every now and then I get an enquiry asking whether it’s possible to use Cantabile’s on-screen keyboard as an input device for another program. It certainly can and this post explains how to set it up so that it’s separate from your normal Cantabile configuration.
Install a Virtual MIDI Cable
The main trick to using Cantabile as an on-screen keyboard for other programs is to use virtual MIDI cable. There’s a few of these available but the one I prefer is loopMIDI by Tobias Erichsen. Download it, install it and run it and you’ll be presented with a screen like this:

Enter “Cantabile Keyboard” in the new port-name field and press the + button to create a new port.
Create a New Cantabile Configuration
Cantabile supports multiple configurations. By creating a new configuration specifically for the standalone keyboard you can keep this setup separate from your normal Cantabile setup.
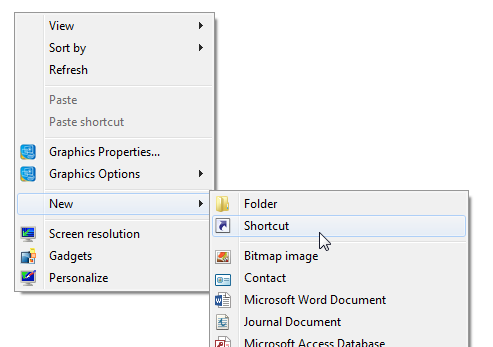
Right click on the Windows desktop, and choose New -> Shortcut
and enter the following (including the “quotes”):
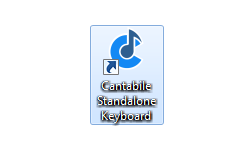
"C:\Program Files\Topten Software\Cantabile 3.0\Cantabile.exe" /config:"Standalone Keyboard"Click Next and enter “Cantabile Standalone Keyboard” for the shortcut name. You should end up with a shortcut on your desktop like this:
Setup Cantabile Options
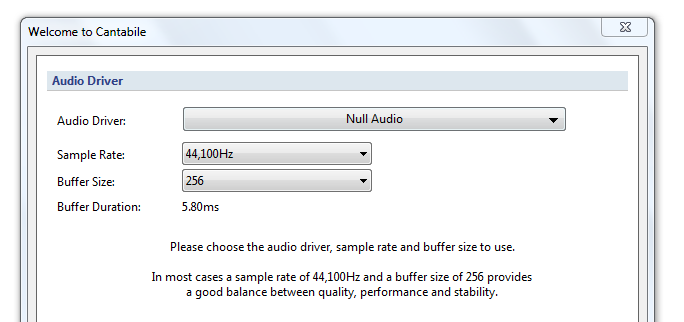
Double click the short-cut and follow the getting started screens until you get to the audio engine options. Since we don’t need to do any audio processing select the Null Audio driver as follows:
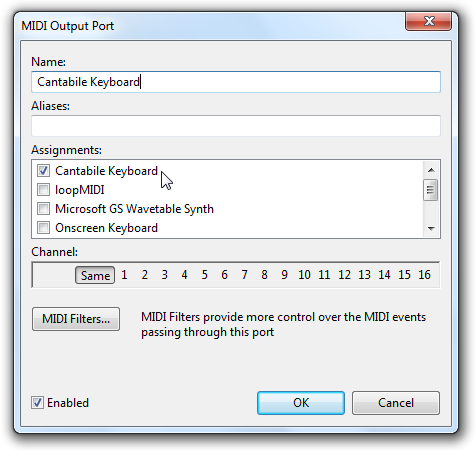
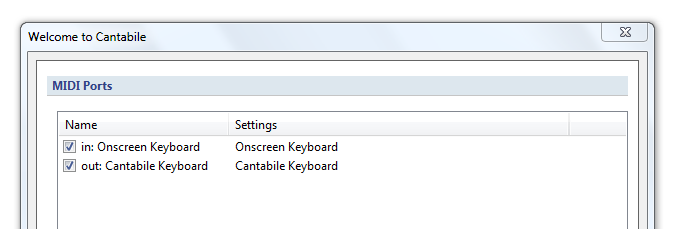
Click Next until you get to the MIDI Port page. On this screen click the Add button, choose Output Port and enter a name of “Keyboard Output” and select the “Keyboard Output” loopMIDI port we created above:
You can then delete all the other ports except for the port you just created and the “in: Onscreen Keyboard” port:
Click Next and then Finish to complete the getting start wizard and get to Cantabile’s main window.
Configuring a Song
Next we need to configure Cantabile to send the “in: Onscreen Keyboard” port to the “out: Cantabile Keyboard” port:
- Show the On-screen Keyboard by choosing View menu -> Onscreen Keyboard
- Choose View menu -> Side Panel -> Monitor
- Expand the input ports section by clicking the little arrow
- Click the Add Route button and choose “Onscreen Keyboard”
- In the next column, choose “Cantabile Keyboard”
- Save the song as “Cantabile Keyboard” from the File menu -> Save
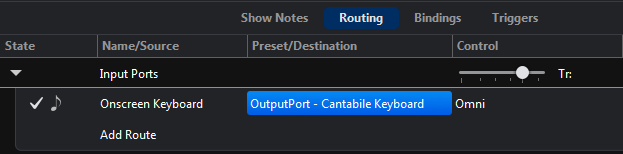
This tells Cantabile to send all MIDI events from the on-screen keyboard to the loop-MIDI device we created.
Play some notes on the keyboard (just click on the notes) and check in the monitor panel that the Onscreen keyboard Cantabile Keyboard ports light up — this indicates MIDI is being sent to the loopMIDI device.
Let’s minimize Cantabile a little:
- Hide Cantabile’s in-app tips by choosing Help menu -> Hide All In-app Tips
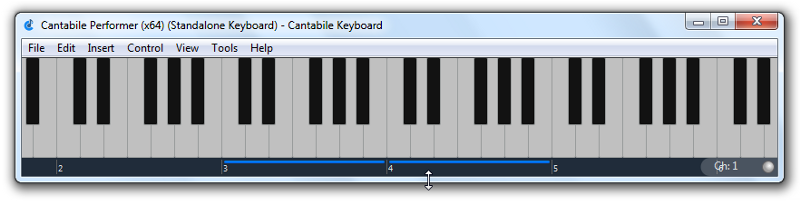
- Resize the keyboard to the desired size by dragging up from it’s top edge
- From the View menu, choose “Toolbar” to hide Cantabile’s main toolbar
- Resize the Main Window so just the keyboard is visible

(Note you’ll need build 3162 or later to be able to resize the main window down to this size)
Configuring the Other Program
Next you’ll need to configure the other program that you want to receive MIDI events from Cantabile. All you need to do is enable the “Cantabile Keyboard” MIDI port. Play on the Cantabile keyboard and you should get MIDI events in the other program.
(The setup here really depends on the other software you’re using which is beyond the scope of this article)
Tips for Using the Keyboard
There’s quite a few tricks to using Cantabile’s keyboard:
- Clicking on notes to play them
- Click and drag to play scales and glissandos
- Play near the top for quiet notes, near the bottom for louder notes
- Holding the Ctrl key while pressing a note will cause it to be held on. Press again with Ctrl to release
- Holding the Shift key simulates the sustain pedal
- Release all held notes with the ‘A’ key
- Play with your PC keyboard with the lower octave starting on the ‘Z’ key or the upper octave starting on the ‘Q’ key. Other keys follow a normal piano keyboard layout. eg: Z=C, S=C#, X=D etc…
- Change the active octaves by clicking in the area below the keyboard where the blue bars are (the bars indicate the active octaves)
- Scroll the keyboard by clicking and dragging on the blue bars
- Change MIDI Channels with the channel selector in the bottom right corner of the keyboard
The keyboard also supports “capture mode” which lets you play with the PC keyboard even if Cantabile’s keyboard isn’t active. Keyboard capture is toggled by pressing the F12 key and is indicated by the green LED indicator next to the channel selector. Capture mode normally only works within Cantabile but you can also make it work across applications in Options -> Keyboard & Control and selecting “Keyboard capture works from:” -> “anywhere”.

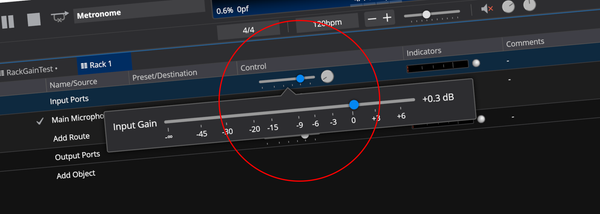
Controller Bar
If you’re running Cantabile Performer you can also enable the Controller Bar. From the View menu, choose “Controller Bar”. Right click to hide most of the standard song and state selection buttons, leaving just the custom buttons and transpose buttons (if you want):
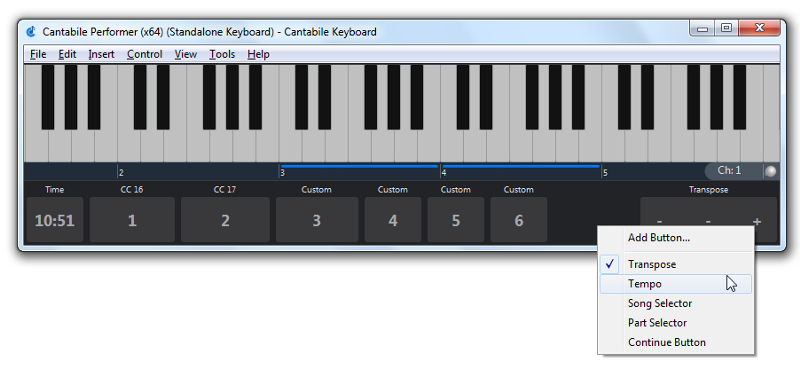
You can then customize these buttons by right clicking on each one. They can be configured to send various MIDI events — everything from CC buttons, CC sliders, buttons, program changes and more.
Advanced
You can ramp things up from here if you need:
- Create a second (or even third) virtual MIDI port for sending data to multiple other programs
- Create multiple routes in Cantabile to send to different virtual cables depending on selected channel
- Broadcast to multiple virtual cables by creating multiple routes
- A combination of the above
You can even go the other way and have Cantabile receive MIDI events and route them to the on-screen keyboard so you can visualize MIDI events from another program.
That’s It
You’ve now got a simple on-screen keyboard that you can use to send MIDI data to other programs and it will run completely independantly from your normal Cantabile setup. Just remember that after you reboot you’ll need to restart loopMIDI too.