Adding Effects to Incoming Audio
This is a quick post to explain how to route incoming audio through an effect and then send it back to an audio output.
Incoming Audio
In order to process an incoming audio signal the first thing we need is the signal itself. To configure this go into Options -> Audio Devices and make sure you have an input audio port configured and that it’s connected to the correct input channels on your audio device.
Here you can see I have a port named “Main Microphone” and it’s connected to the “HD Audio Microphone” channels on my sound card.
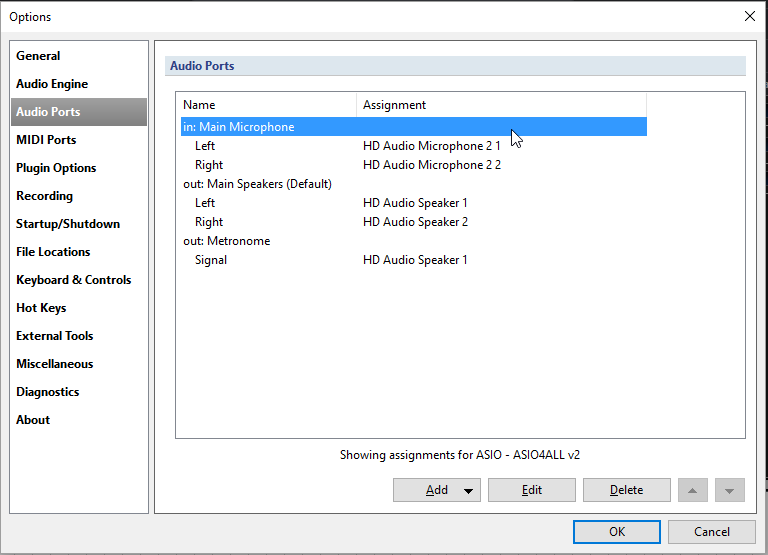
While you’re at it check you have similar audio ports for the audio output. Here I have a port named “Main Speakers” connected to the “HD Audio Speaker” channels.
These ports “Main Microphone” and “Main Speakers” are now available to all songs Cantabile.
Loading an Effect
The next thing we need is the effect itself. Assuming you’ve got your plugin path setup and scanned (if not go to Options -> Plugin Options and enter the path to your VST plugins) insert a plugin by clicking the Add Object button, choose “Plugin” and then locate the plugin you want.
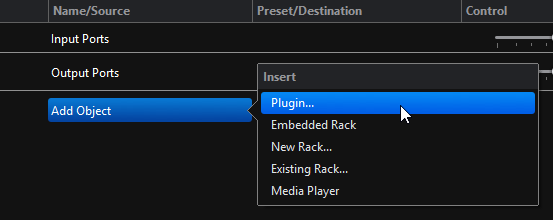
Here you can see I’ve inserted the “mda Vocoder” plugin:
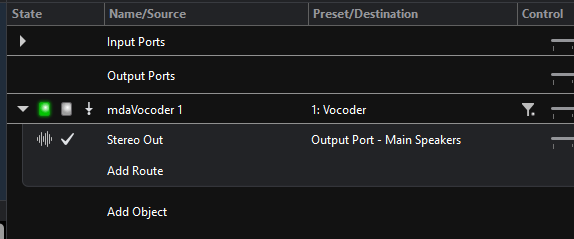
You’ll notice underneath the plugin is already an audio route from the plugin’s Stereo Out to the Main Speakers. Cantabile created this automatically because you’ll see in the above screen shot that Main Speakers port is marked as “Default”.
Connecting Input to the Plugin
Finally we need to connect our “Main Microphone” port to the plugin. To do this, expand the Input Ports section by clicking the little arrow to it’s left:
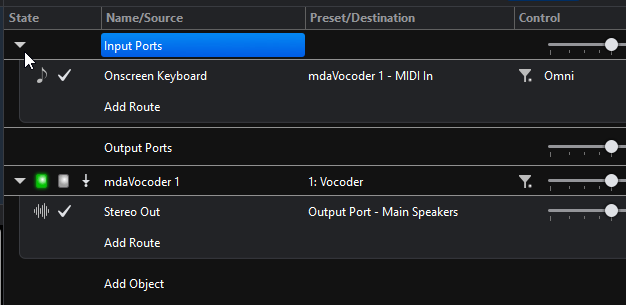
You’ll notice there is already a MIDI route from the Onscreen Keyboard to the vocoder plugin. This is because the my Onscreen Keyboard is marked as the default device and the plugin indicates that it wants MIDI input. Since we don’t need to send MIDI to the plugin we can delete that route and create an audio route instead.
Create the audio route by clicking “Add Route” and choosing “Main Microphone” as the source and “mda Vocoder — Stereo In” as the target:
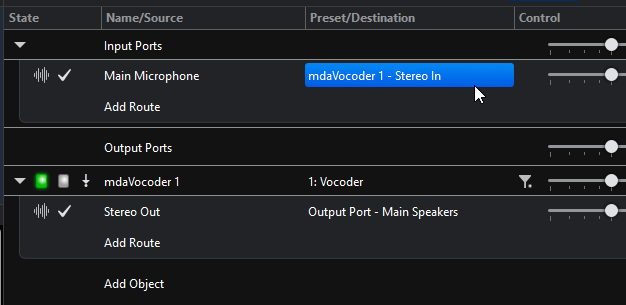
Once you create the audio route you should find the effect being applied and hear it on your speakers — watch out for feedback loops.
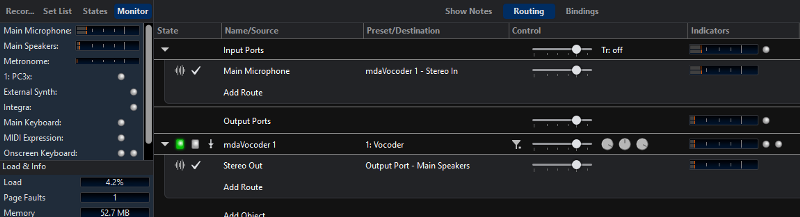
Here you can see the whole chain including level meters lit up to show audio signals:
Extending the Chain
Once you understand this basic concept of connecting objects together it’s easy to see how you might extend the chain.
Here I’ve added a second effect plugin (PSP Lotary), connected the vocoder’s stereo out to its input (and again removed the unnecessary MIDI input route to the effect plugin).

Switching Plugins
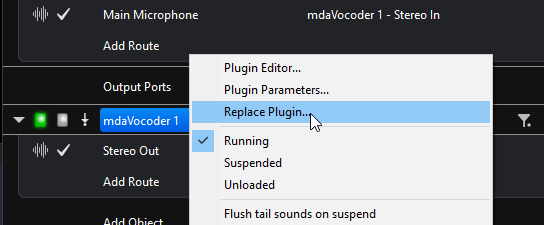
If you don’t like the effect you’ve loaded — you can now easily switch to another plugin by right clicking on the effect plugin slot and choosing “Replace Plugin”.
Troubleshooting
If you find the above doesn’t work here are some steps to help troubleshoot:
- Check you’re getting an input signal by switching to the monitor tab — you should see the level indicator light up next to the Main Microphone port.
- Check you’re getting audio signals to and from the plugin by checking the level meters on the Input Ports audio route and on the plugin slot itself.
- Check you’ve got an audio route from the plugin to the Main Speakers and that it’s signal level meter is lighting up.
- Check your master volume levels
Failing all of the above there are more tips for diagnosing no sound problems here.